Once again, random browsing on Taobao brought the need for me to shop for random crap^Hstuff.
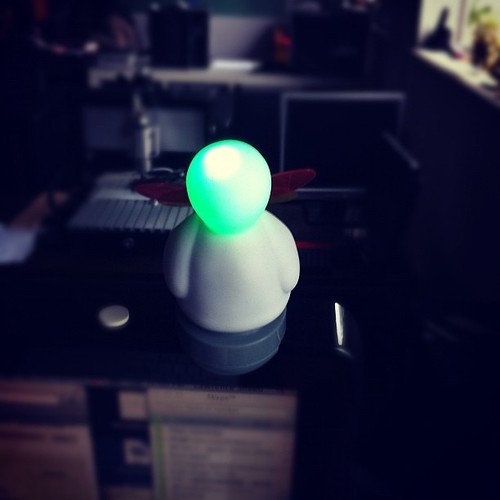
This time, I bought a USB eBuddy (for a grand total of 60RMB including shipping)
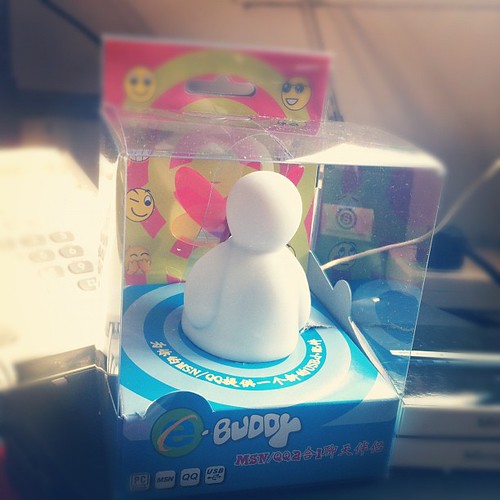
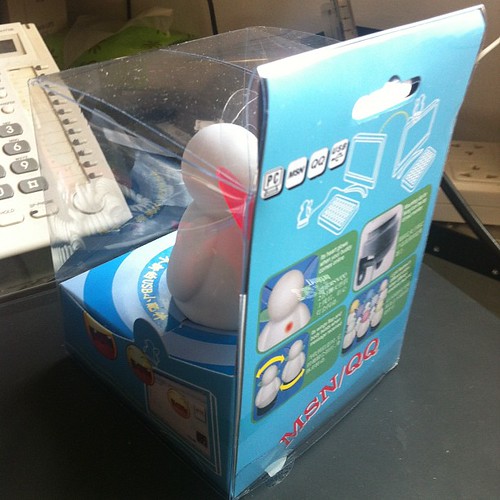
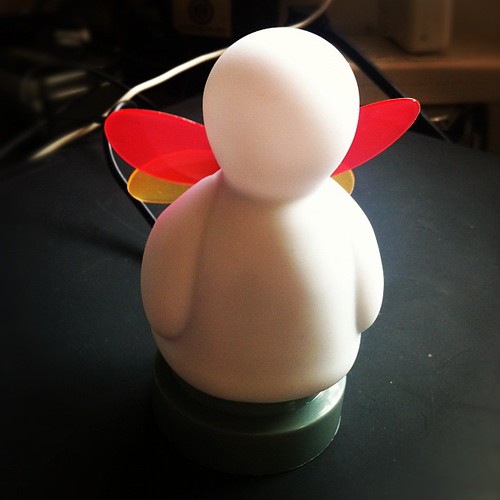
The eBuddy is a small MSN / QQ physical avatar that performs certain actions based on its software – e.g. flashing lights, moving its wings, shaking left or right etc.
It looks like a little white angel with MSN color wings.
For a cheap toy, its actually quite cool. Cute too, but cool also.
Out of the box, its aimed squarely at Windows users. As I don’t actually run the devil’s OS, I hooked it up to a Debian box instead.
I was hoping for a little bit of fun integrating it with things, but that was not to be.
There is already a perfectly fine library written in Python that works beautifully to make it dance and sing* here
*Dancing and singing void where prohibited.
The python library is already set to run as a daemon on port 8888, and sits waiting for action out of the box.
The settings below snarfed from the code give an idea of what actions can be given:
Commands:
# GLADNESS =        00
# FEAR =            01
# FIZZ =            02
# PLEASANTSURPRISE =03
# GRIEF = 		04
# FURY = 		05
# QUELL = 		06
# REDHEAD = 		07
# GREENHEAD = 		08
# BLUEHEAD = 		09
# YELLOWHEAD =		10
# BLAME = 		11
# BLUEGREENHEAD =	12
# WHITEHEAD = 		13
# HEART = 		14
# WINGS = 		15
# BODY = 		16
# NOEFFECT = 		17
# ONLINE = 		18
# BUSY = 		19
# DAZE = 		20
# BACKSOON = 		21
# AWAY = 		22
# PHONE = 		23
# LUNCH = 		24
# OFFLINE = 		25
Mostly they consist of flashing various LED’s within the eBuddy on/off and optionally moving the wings or shaking the eBuddy left right.
Simple, but effective.
I use Zoneminder in the office on my Debian based ZFS NAS (HP Proliant Microserver), so thought one fun way would be to integrate the eBuddy to Zoneminder. This also proved to be too easy sadly.
Zoneminder has a wiki entry which gives 99% of whats needed here
I literally had to write 1 line of code to integrate the eBuddy with Zoneminder.
#!/usr/bin/perl -w

use strict;

use ZoneMinder;

$| = 1;

zmDbgInit( "myscript", level=>0, to_log=>0, to_syslog=>0, to_term=>1 );

my $dbh = DBI->connect( "DBI:mysql:database=".ZM_DB_NAME.";host=".ZM_DB_HOST, ZM_DB_USER, ZM_DB_PASS );

my $sql = "select M.*, max(E.Id) as LastEventId from Monitors as M left join Events as E on M.Id = E.MonitorId where M.Function != 'None' group by (M.Id)";
my $sth = $dbh->prepare_cached( $sql ) or die( "Can't prepare '$sql': ".$dbh->errstr() );

my $res = $sth->execute() or die( "Can't execute '$sql': ".$sth->errstr() );
my @monitors;
while ( my $monitor = $sth->fetchrow_hashref() )
{
    push( @monitors, $monitor );
}

while( 1 )
{
    foreach my $monitor ( @monitors )
    {
        next if ( !zmMemVerify( $monitor ) );

        if ( my $last_event_id = zmHasAlarmed( $monitor, $monitor->{LastEventId} ) )
        {
            $monitor->{LastEventId} = $last_event_id;
            print( "Monitor ".$monitor->{Name}." has alarmed\n" );
	    #The Single Line of Code - it sends a flash green signal to the Python Daemon
            system ("echo 8 | nc -q0 -u localhost 8888");
	    #
            # Do your stuff here
            #
        }
    }
    sleep( 1 );
}
I think I’ll be getting a couple more of these, as the integration is easy.
Next up, server load monitoring – I can have a couple of these on the top of my desk for each server, and hopefully address each one separately for load purposes – e.g. flash yellow, red on load average, and shake if queue’s are large.
Gimmicky, but useful.
Here are a couple of shots of the current incumbent in situ –
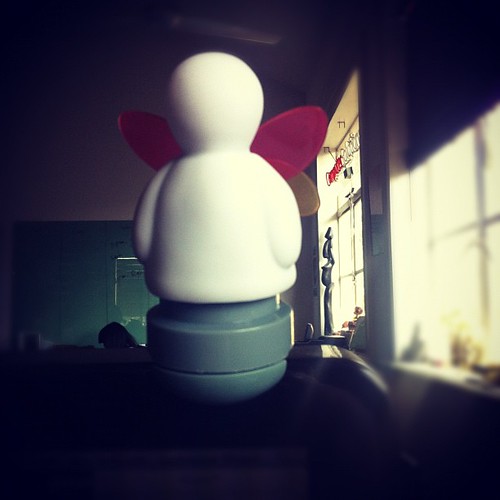
…and one of it actually working.
(It flashes green if someone comes up the stairs and zone minder triggers.)
I’m quite happy I spent the 60rmb, although I would have enjoyed more hacking. I literally spent 5 minutes getting things running.
Thats not a bad thing, but I was hoping for something a little deeper!
Going to order a few more now.
I got mine here – http://item.taobao.com/item.htm?id=1799393549
Recommended.
As its been a long while since I’ve done a non computer related post, its now time for something completely different.
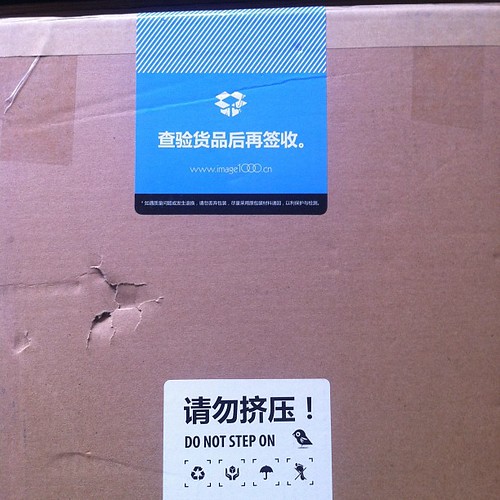
Anyone who has visited our office has noticed that we receive a bazillion packages daily from my various shopping exploits on Taobao, slayer of money.
I just bought a new house back home, which has started competing with Taobao on the where do I spend my spare change, and I’ve been interested in decorating it with some “art”.
Yes, I know that one persons art is another persons ‘meh – you like that? icky’, but each to his own.
I found a gorgeous looking hi-res map of Shanghai for sale at one quite nicely designed store ( http://www.image1000.cn/ ), and contacted the seller.

Unfortunately he couldn’t sell the canvas image on a roll, as I needed for easy shipping back home, and could only sell pre-framed.
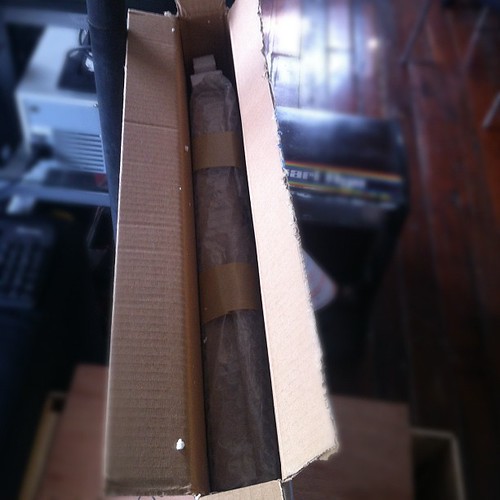
Roll on two weeks later, and I was still thinking about having that in my lounge back home, so decided on making a test order to check out the packaging, and its survivability vs Shanghai kuaidi (delivery) companies.
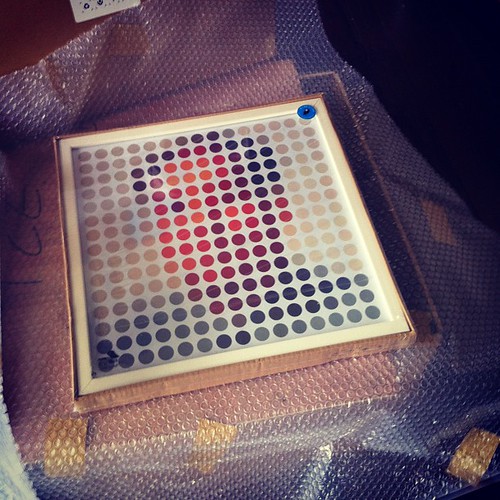
I picked a minimalist dot version of Mao for 100RMB including shipping, and ordered.
Two days later, Mao arrived.
Unpacking below:
Fresh from the Kuaidi company!

Nice packaging touches.
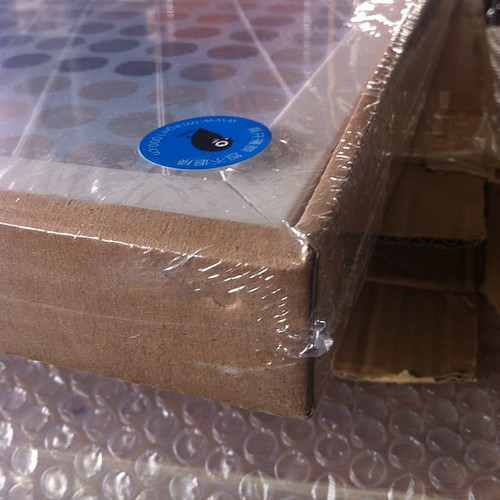
Uh oh!
Still well packed.
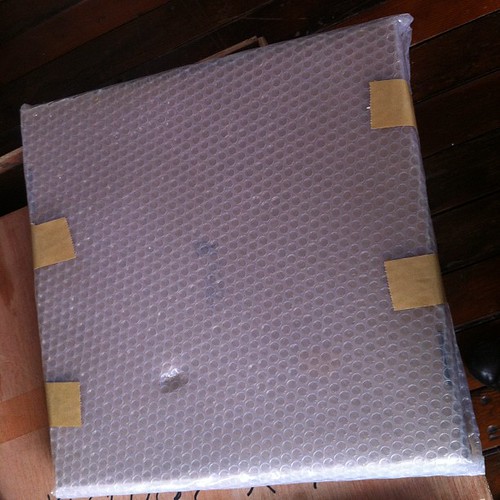
Kuaidi vs Packaging, who will win?
More uh-oh..
Packaging wins (although it was a close call).
Phew, looks ok.
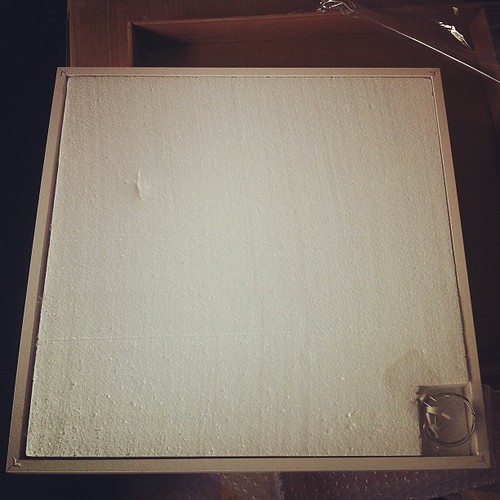
Inside packaging (really really well packaged!)
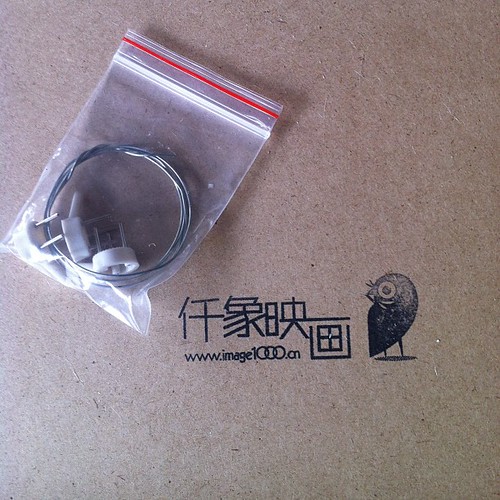
Even comes with the hanging equipment, which is a nice touch.

So much attention to detail (plastic cover strip for acrylic front frame “glass”)

Its Twister!
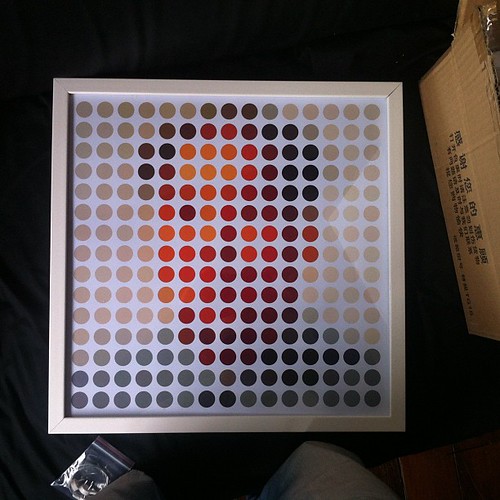
Oh wait, no, its Mao 🙂
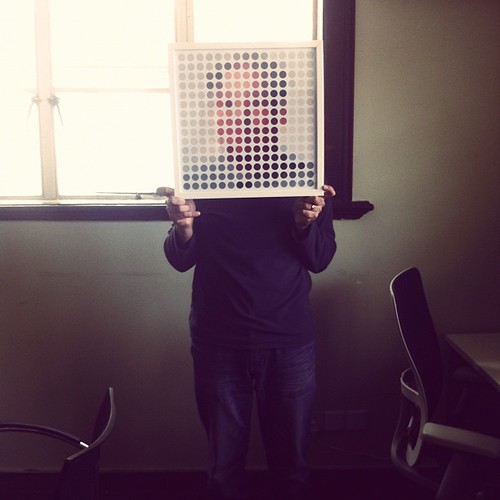
Amjellybaby models the artwork.
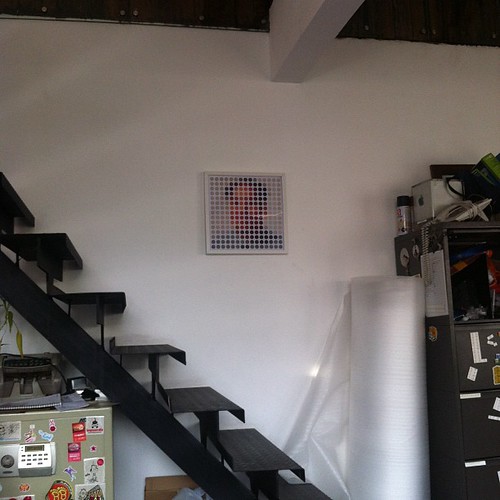
Finally, in situ!
Overall, reasonably happy with this. Price is reasonable, and it (barely) survived the shipping company, so I think there would be a chance that a slightly better packaged version (i.e. adding a few layers of bubble wrap on the outside) will survive.
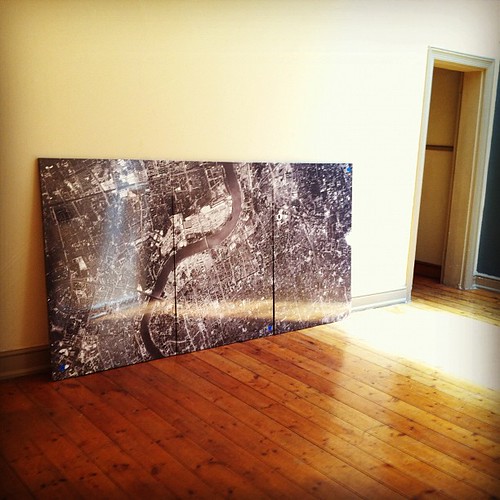
So, looks like I’ll be springing the 900rmb odd for the large canvas map version.
Wish me luck!
Addendum
Ordered the large triptych and crossed my fingers that it would survive Emirates.
It made the journey in better shape than the Mao print above did across Shanghai. No dents and zero issues.
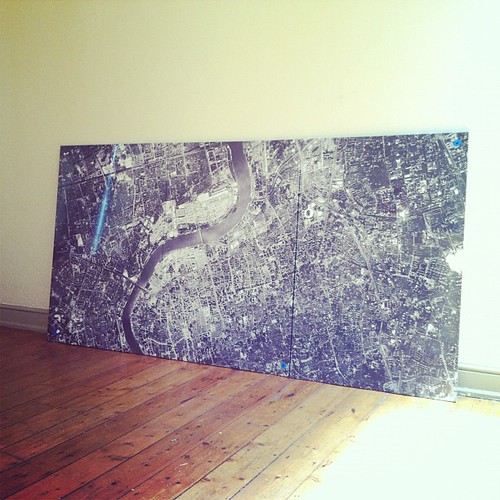
Here they are in my new house, awaiting hanging…
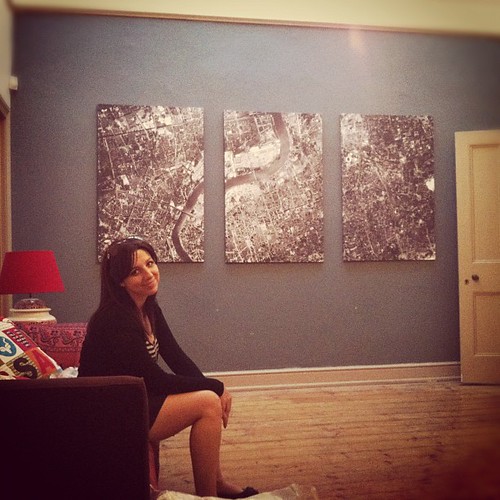
Pricey at 900rmb, but worth it. Now I can point at locations on the satellite image and tell people I was here when they come visit the house!
2nd Addendum – final shot of this in place, finally on the wall after 2 weeks of sitting on the floor…
As I’ve been dabbling in the mad sciences recently, I thought I’d get some more toys.
This culminated in the purchase of a laser engraver.
This is it sitting next to another interesting toy I own – a CNC. He who dies with the most toys wins dontcha know 🙂
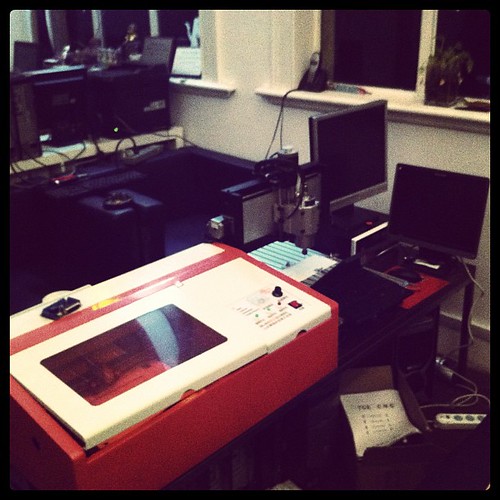
The engraver came with some exceedingly shite Chinese software (Moshi Engraver), but I did know that, and had ordered a cnc controller board with the idea of retrofitting that in. (its actually in the photo above funnily enough)
It has sat in the office mildly unused, but still in my thoughts.
One of my clients finally asked what was that large orange thing upstairs, and I dragged it out and setup for them to show off some test paper cuts.
Tomorrow will take a closer look at working out the pinouts as I didn’t get very far today in getting EMC2 talking nicely to to the Y axis (which was the goal for tonight).
Long term will be interested in making it work as a printer driven hardware device, but for now EMC2 is good enough.
http://www.laoslaser.org/ is making interesting progress in that regard, and I might look at talking directly to the Engraver factory about integrating and making a few with a few to selling a *decent* version.
As this will be a work in progress, here are the links that will be useful.
Some need a vee pee en to view in China sadly.
http://www.cnczone.com/forums/laser_engraving_cutting_machines/138554-cheap_laser_cutter_modifications.html
http://www.thinkhaus.org/2010/06/19/howto-turn-a-cheap-chinese-laser-engraver-into-a-pretty-good-laser-cutter/
http://www.stephenhobley.com/blog/2011/04/15/upgrading-a-laser-cutter-from-china/
http://www.andyslater.com/laser-cutting/cnc-conversion.html
http://dank.bengler.no/-/page/show/5473_connectinggrbl
http://www.synthfool.com/laser/
http://www.laoslaser.org/
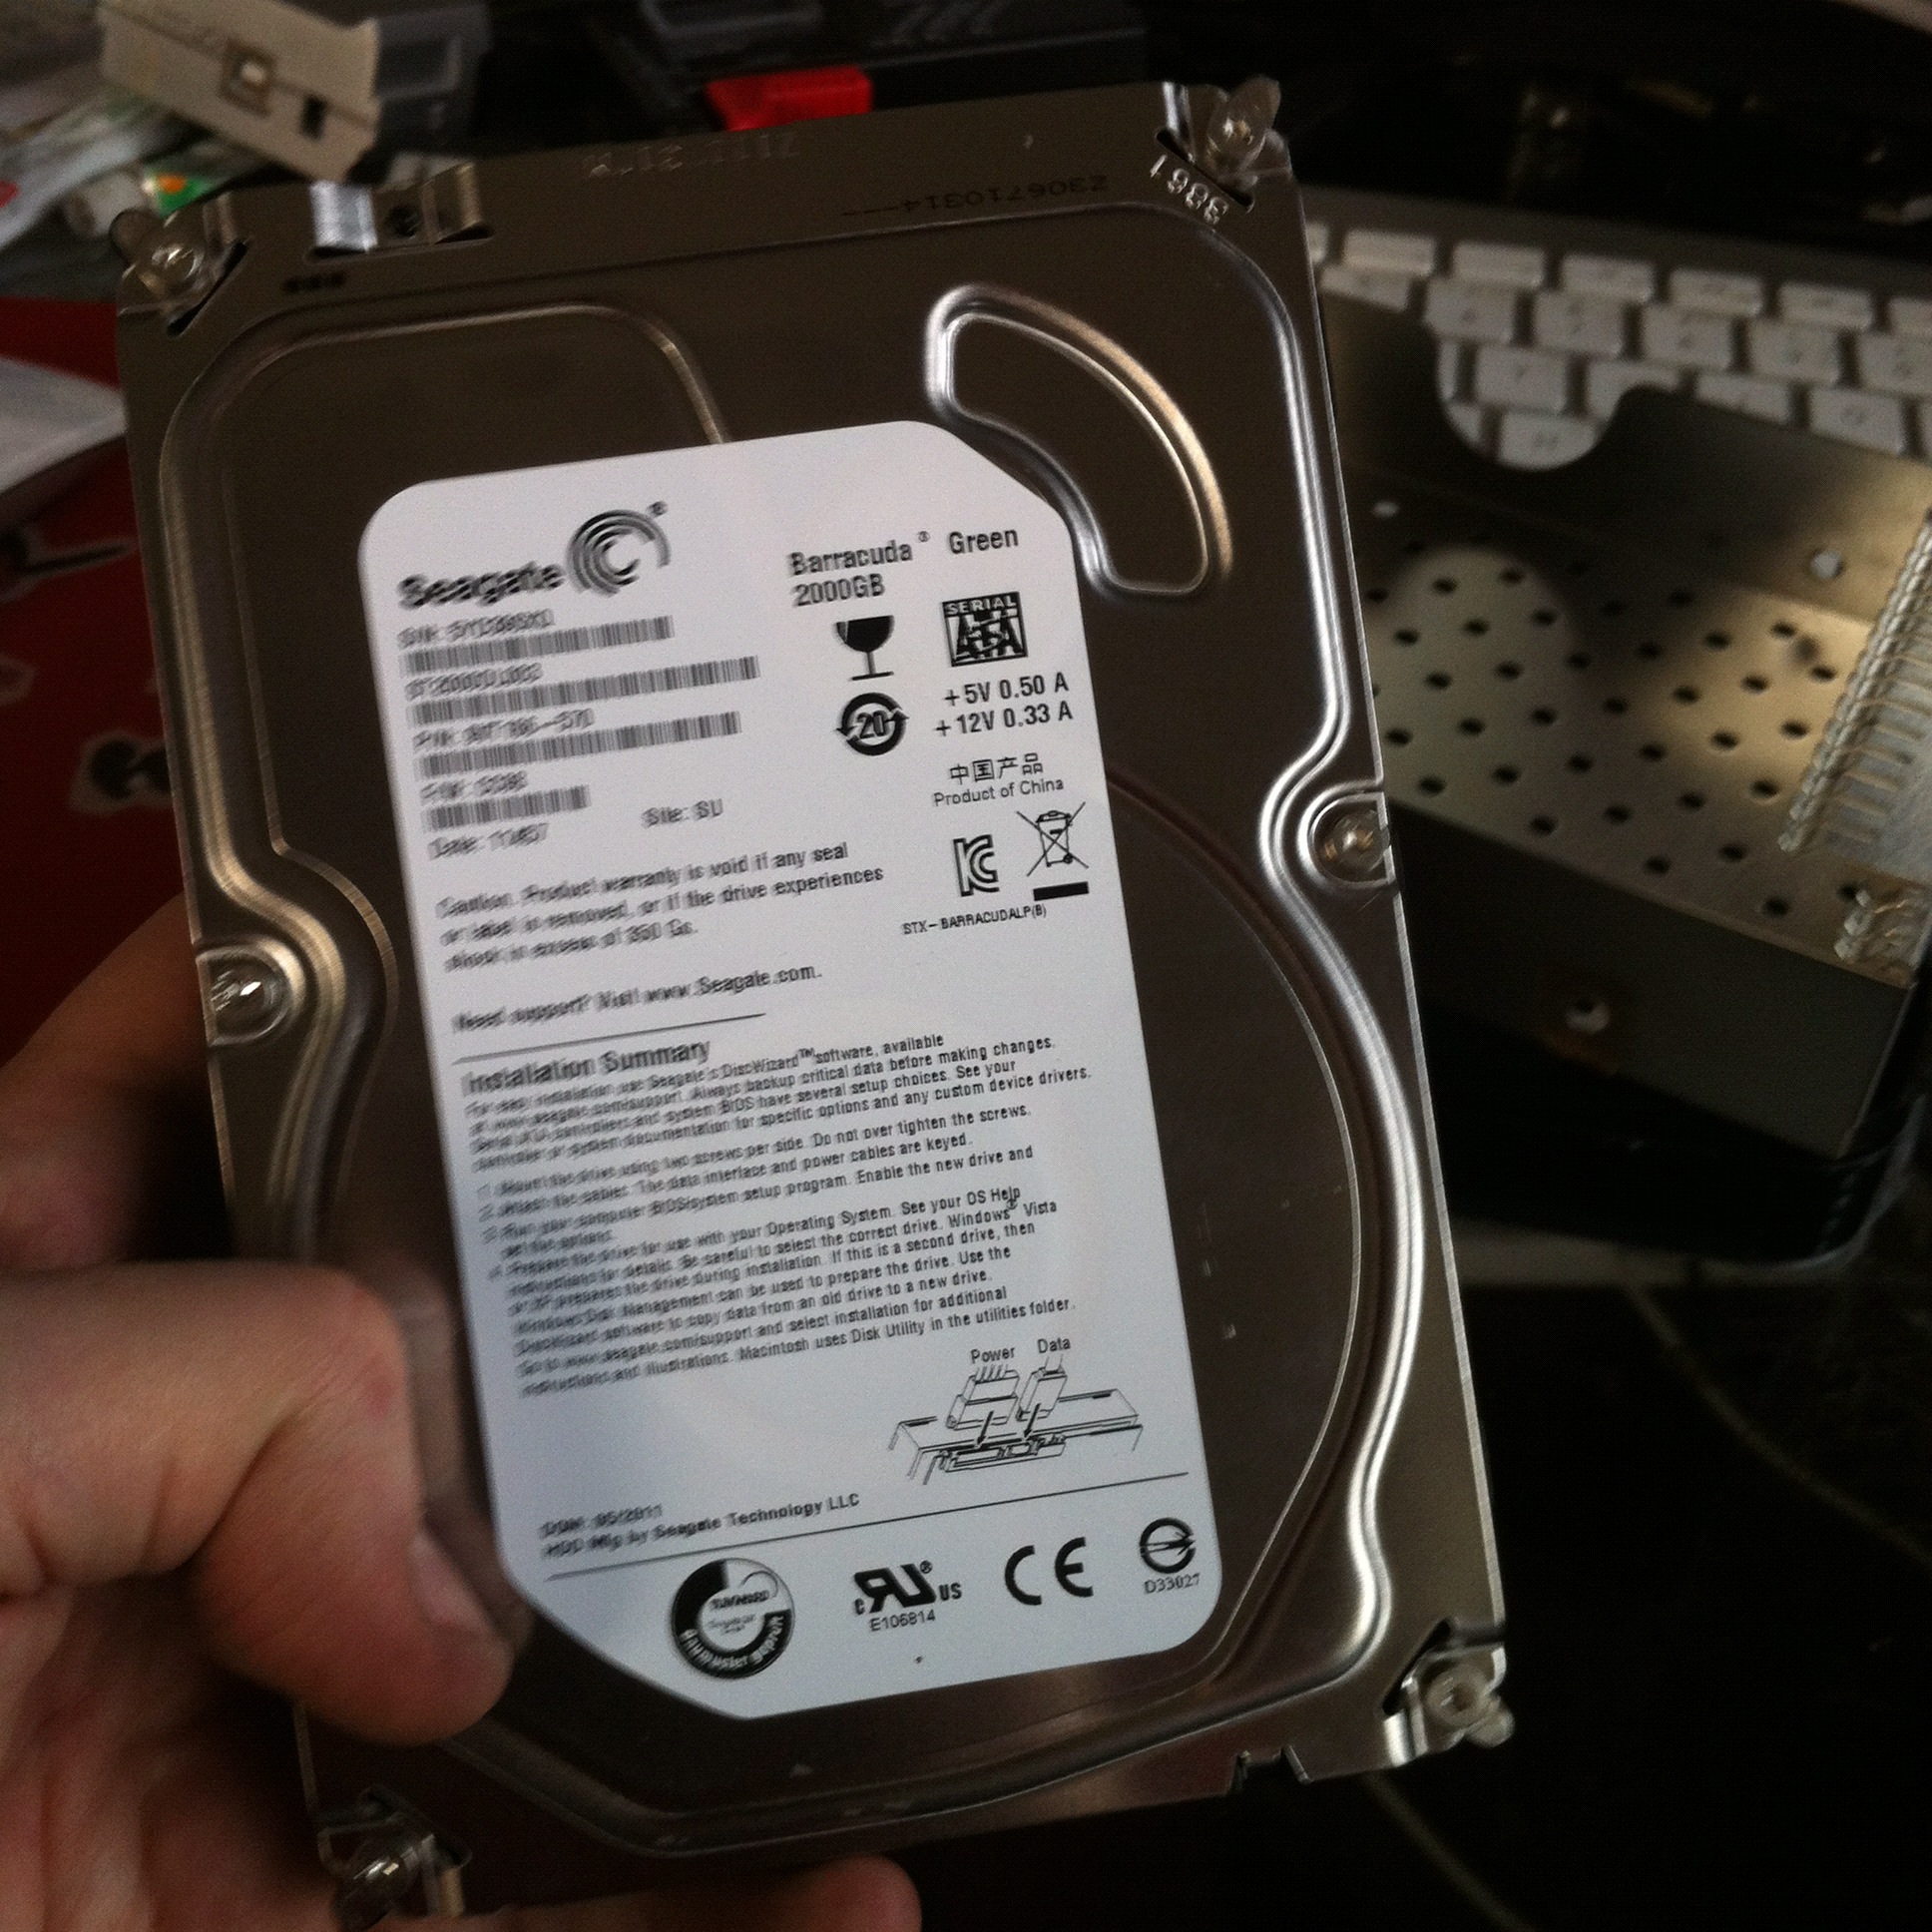
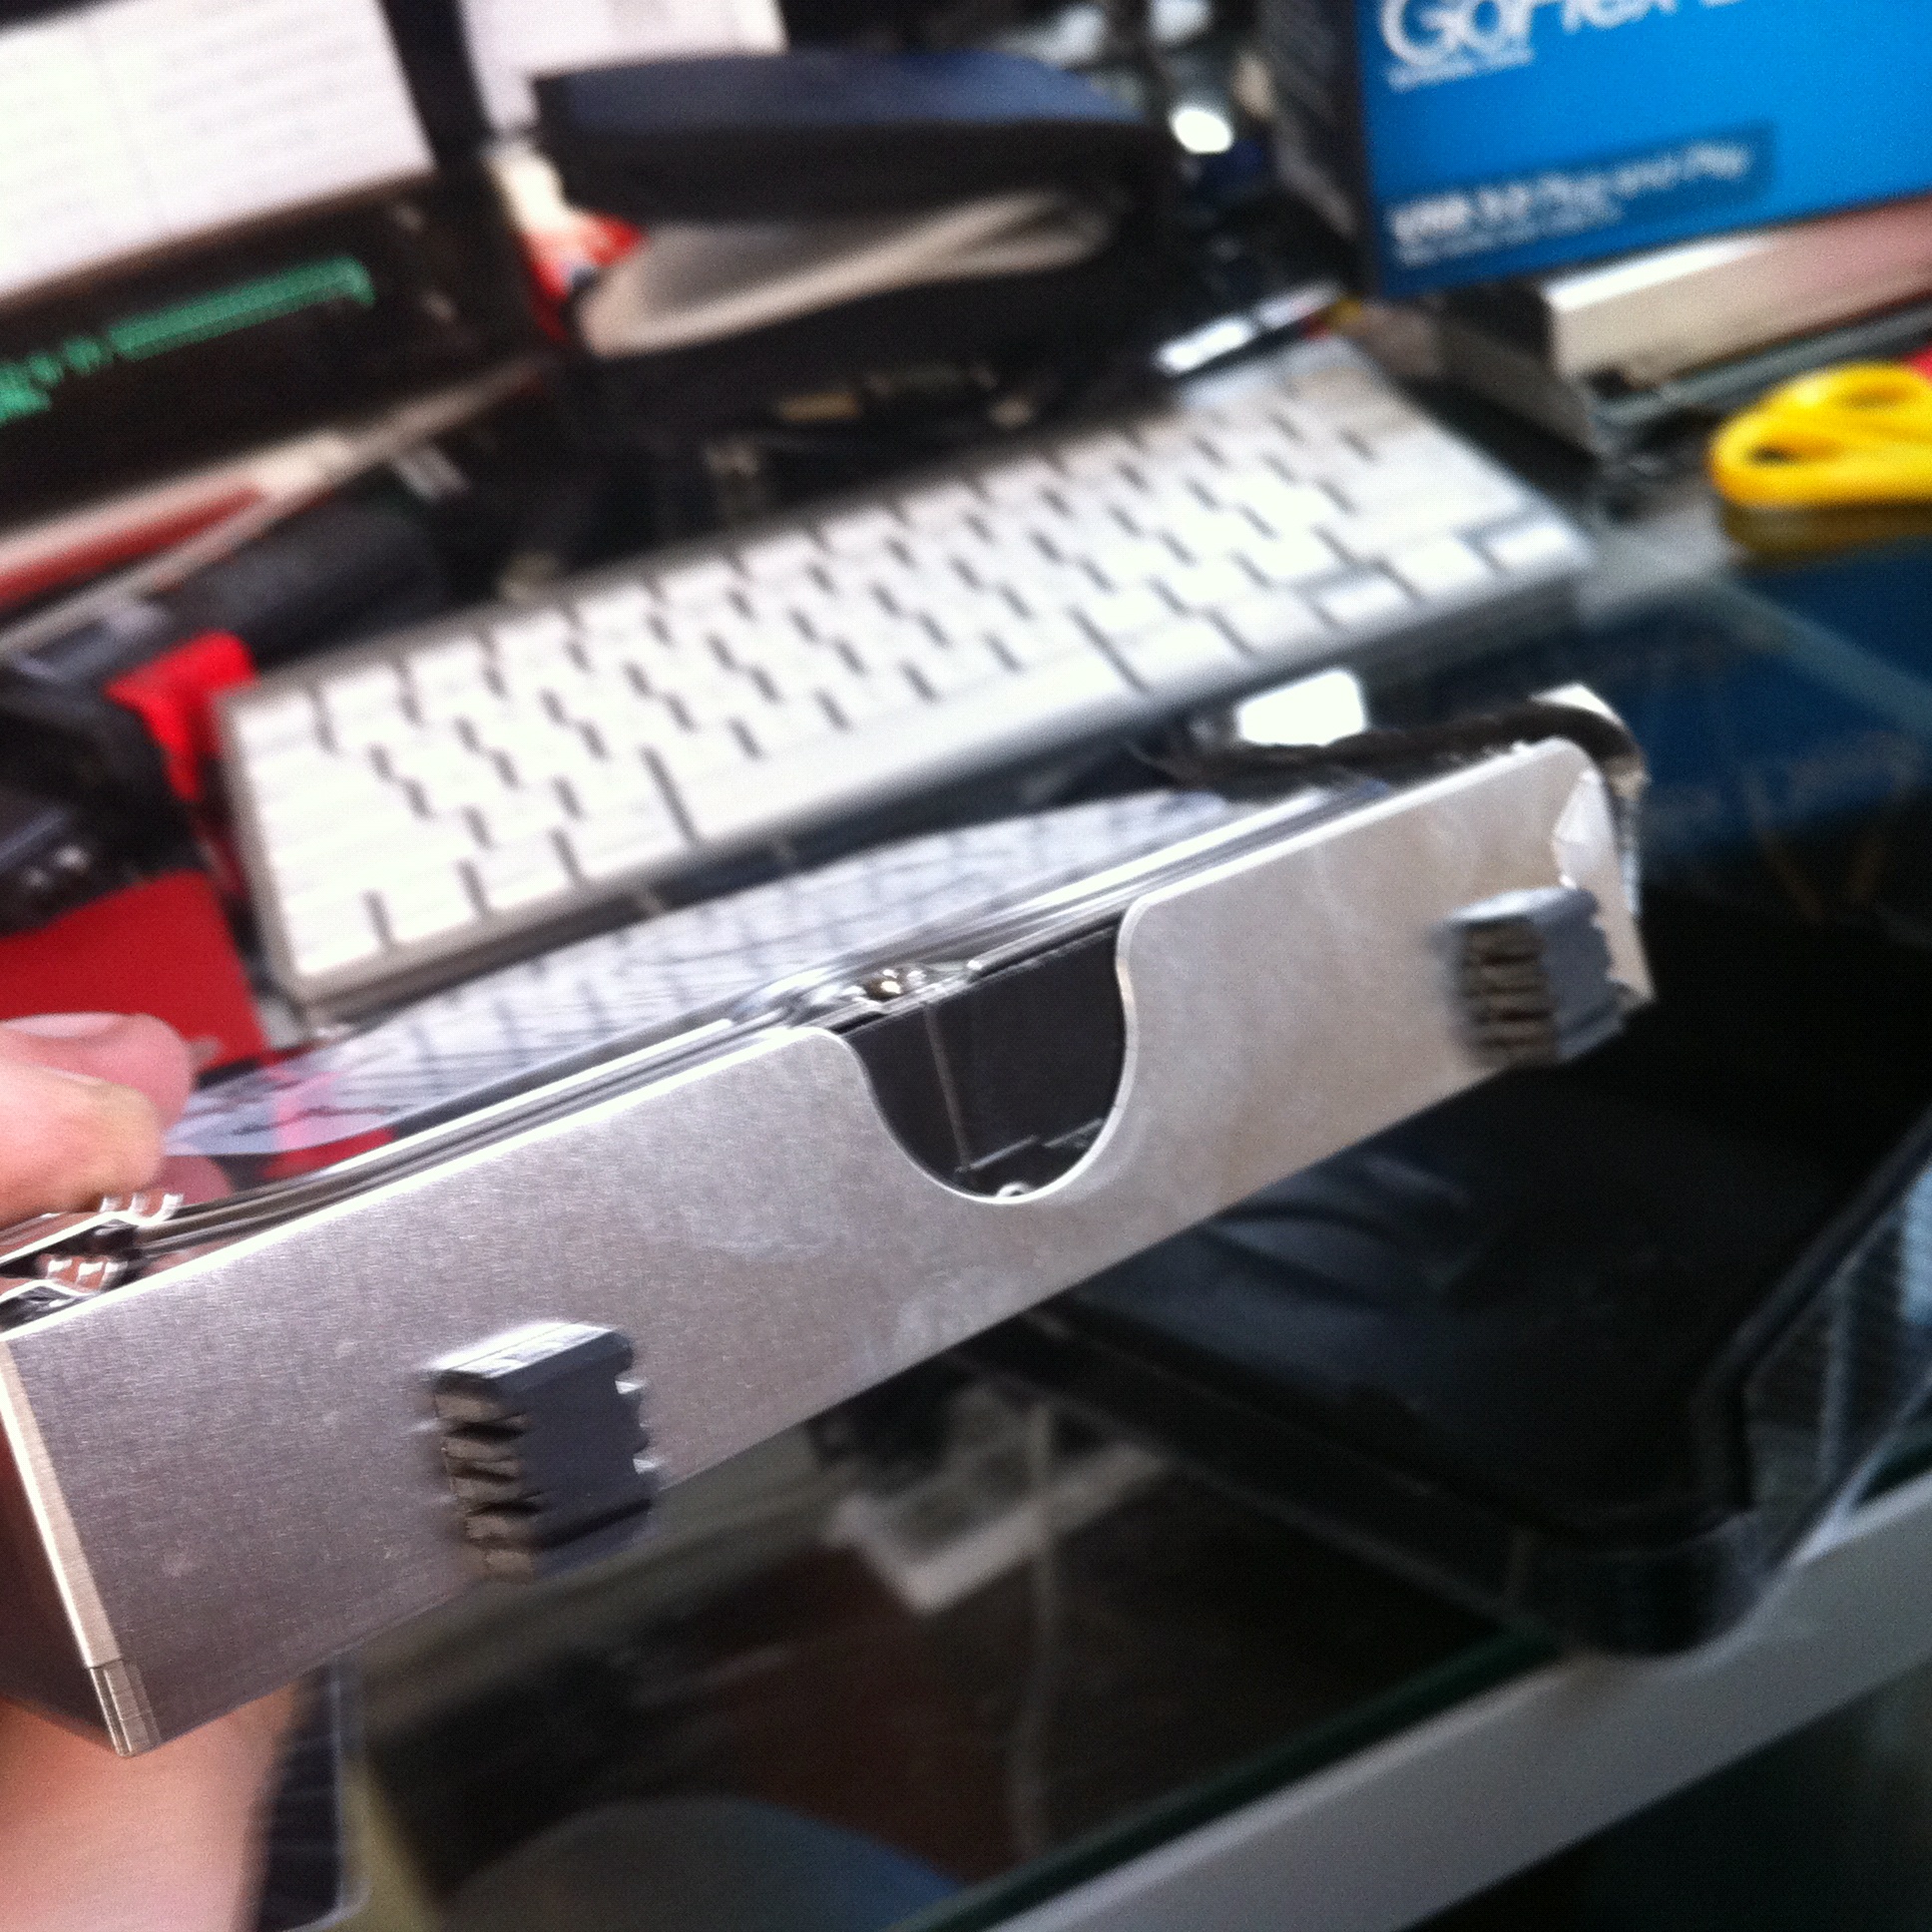
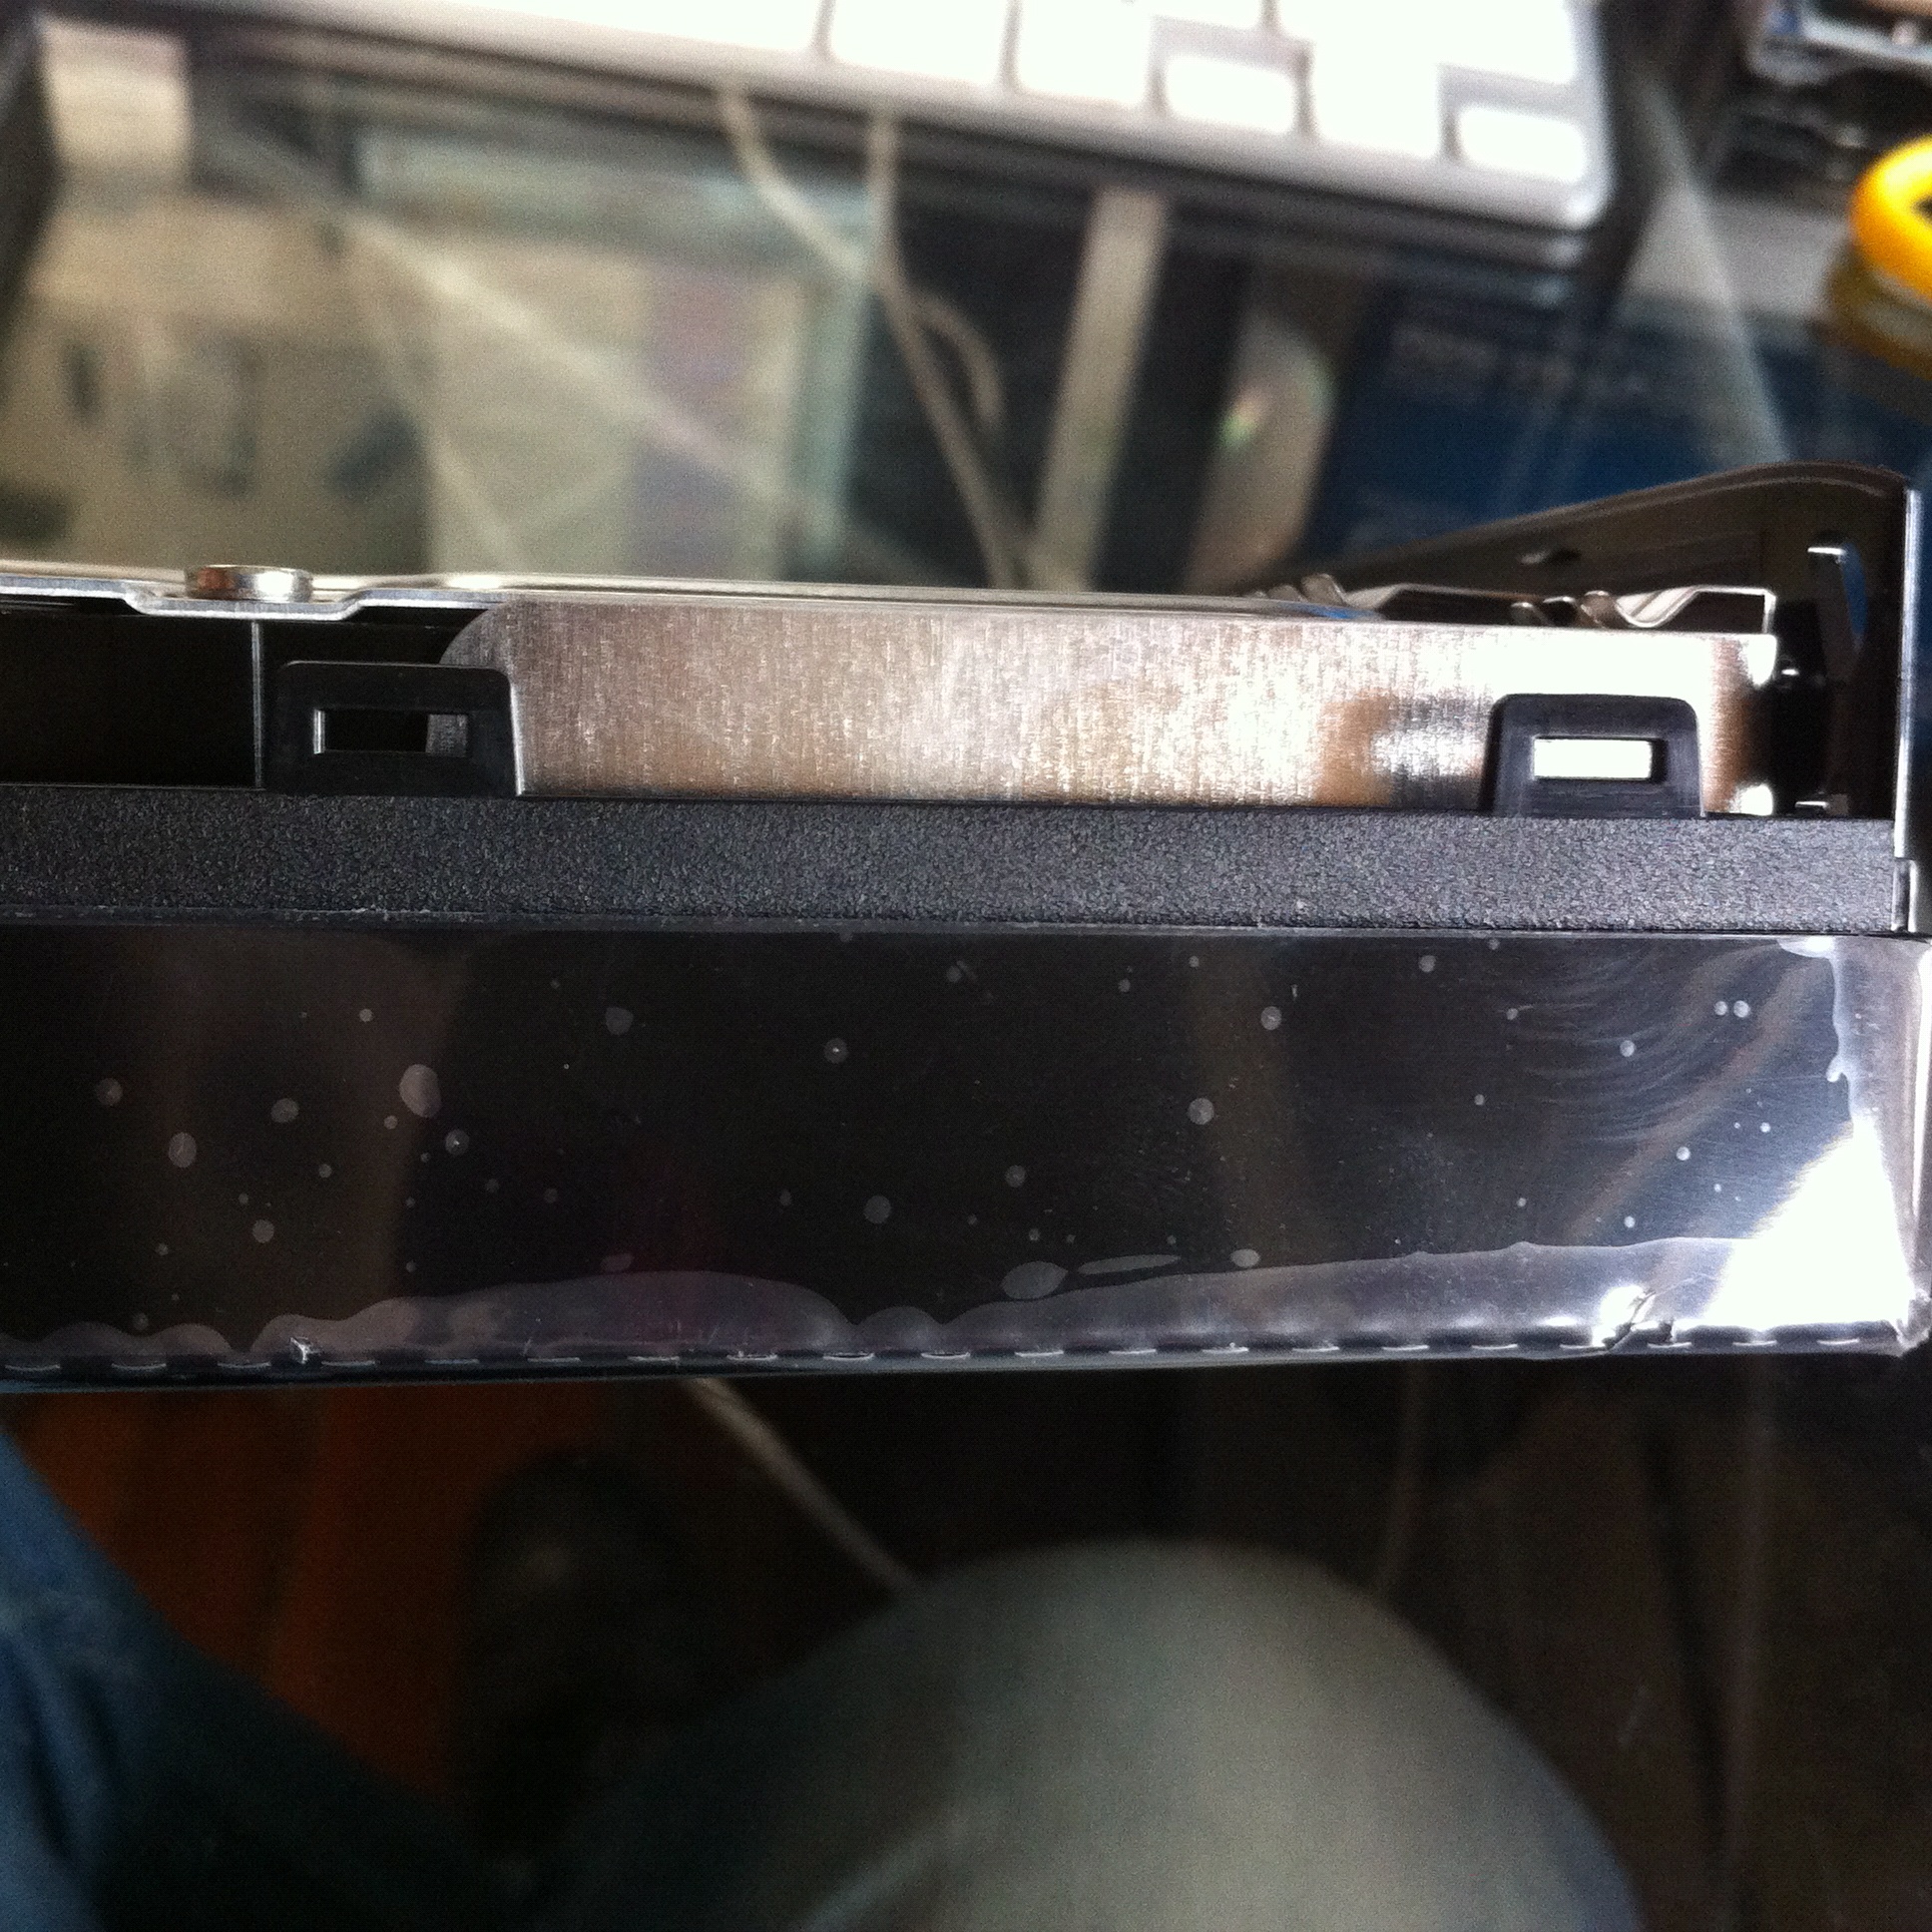
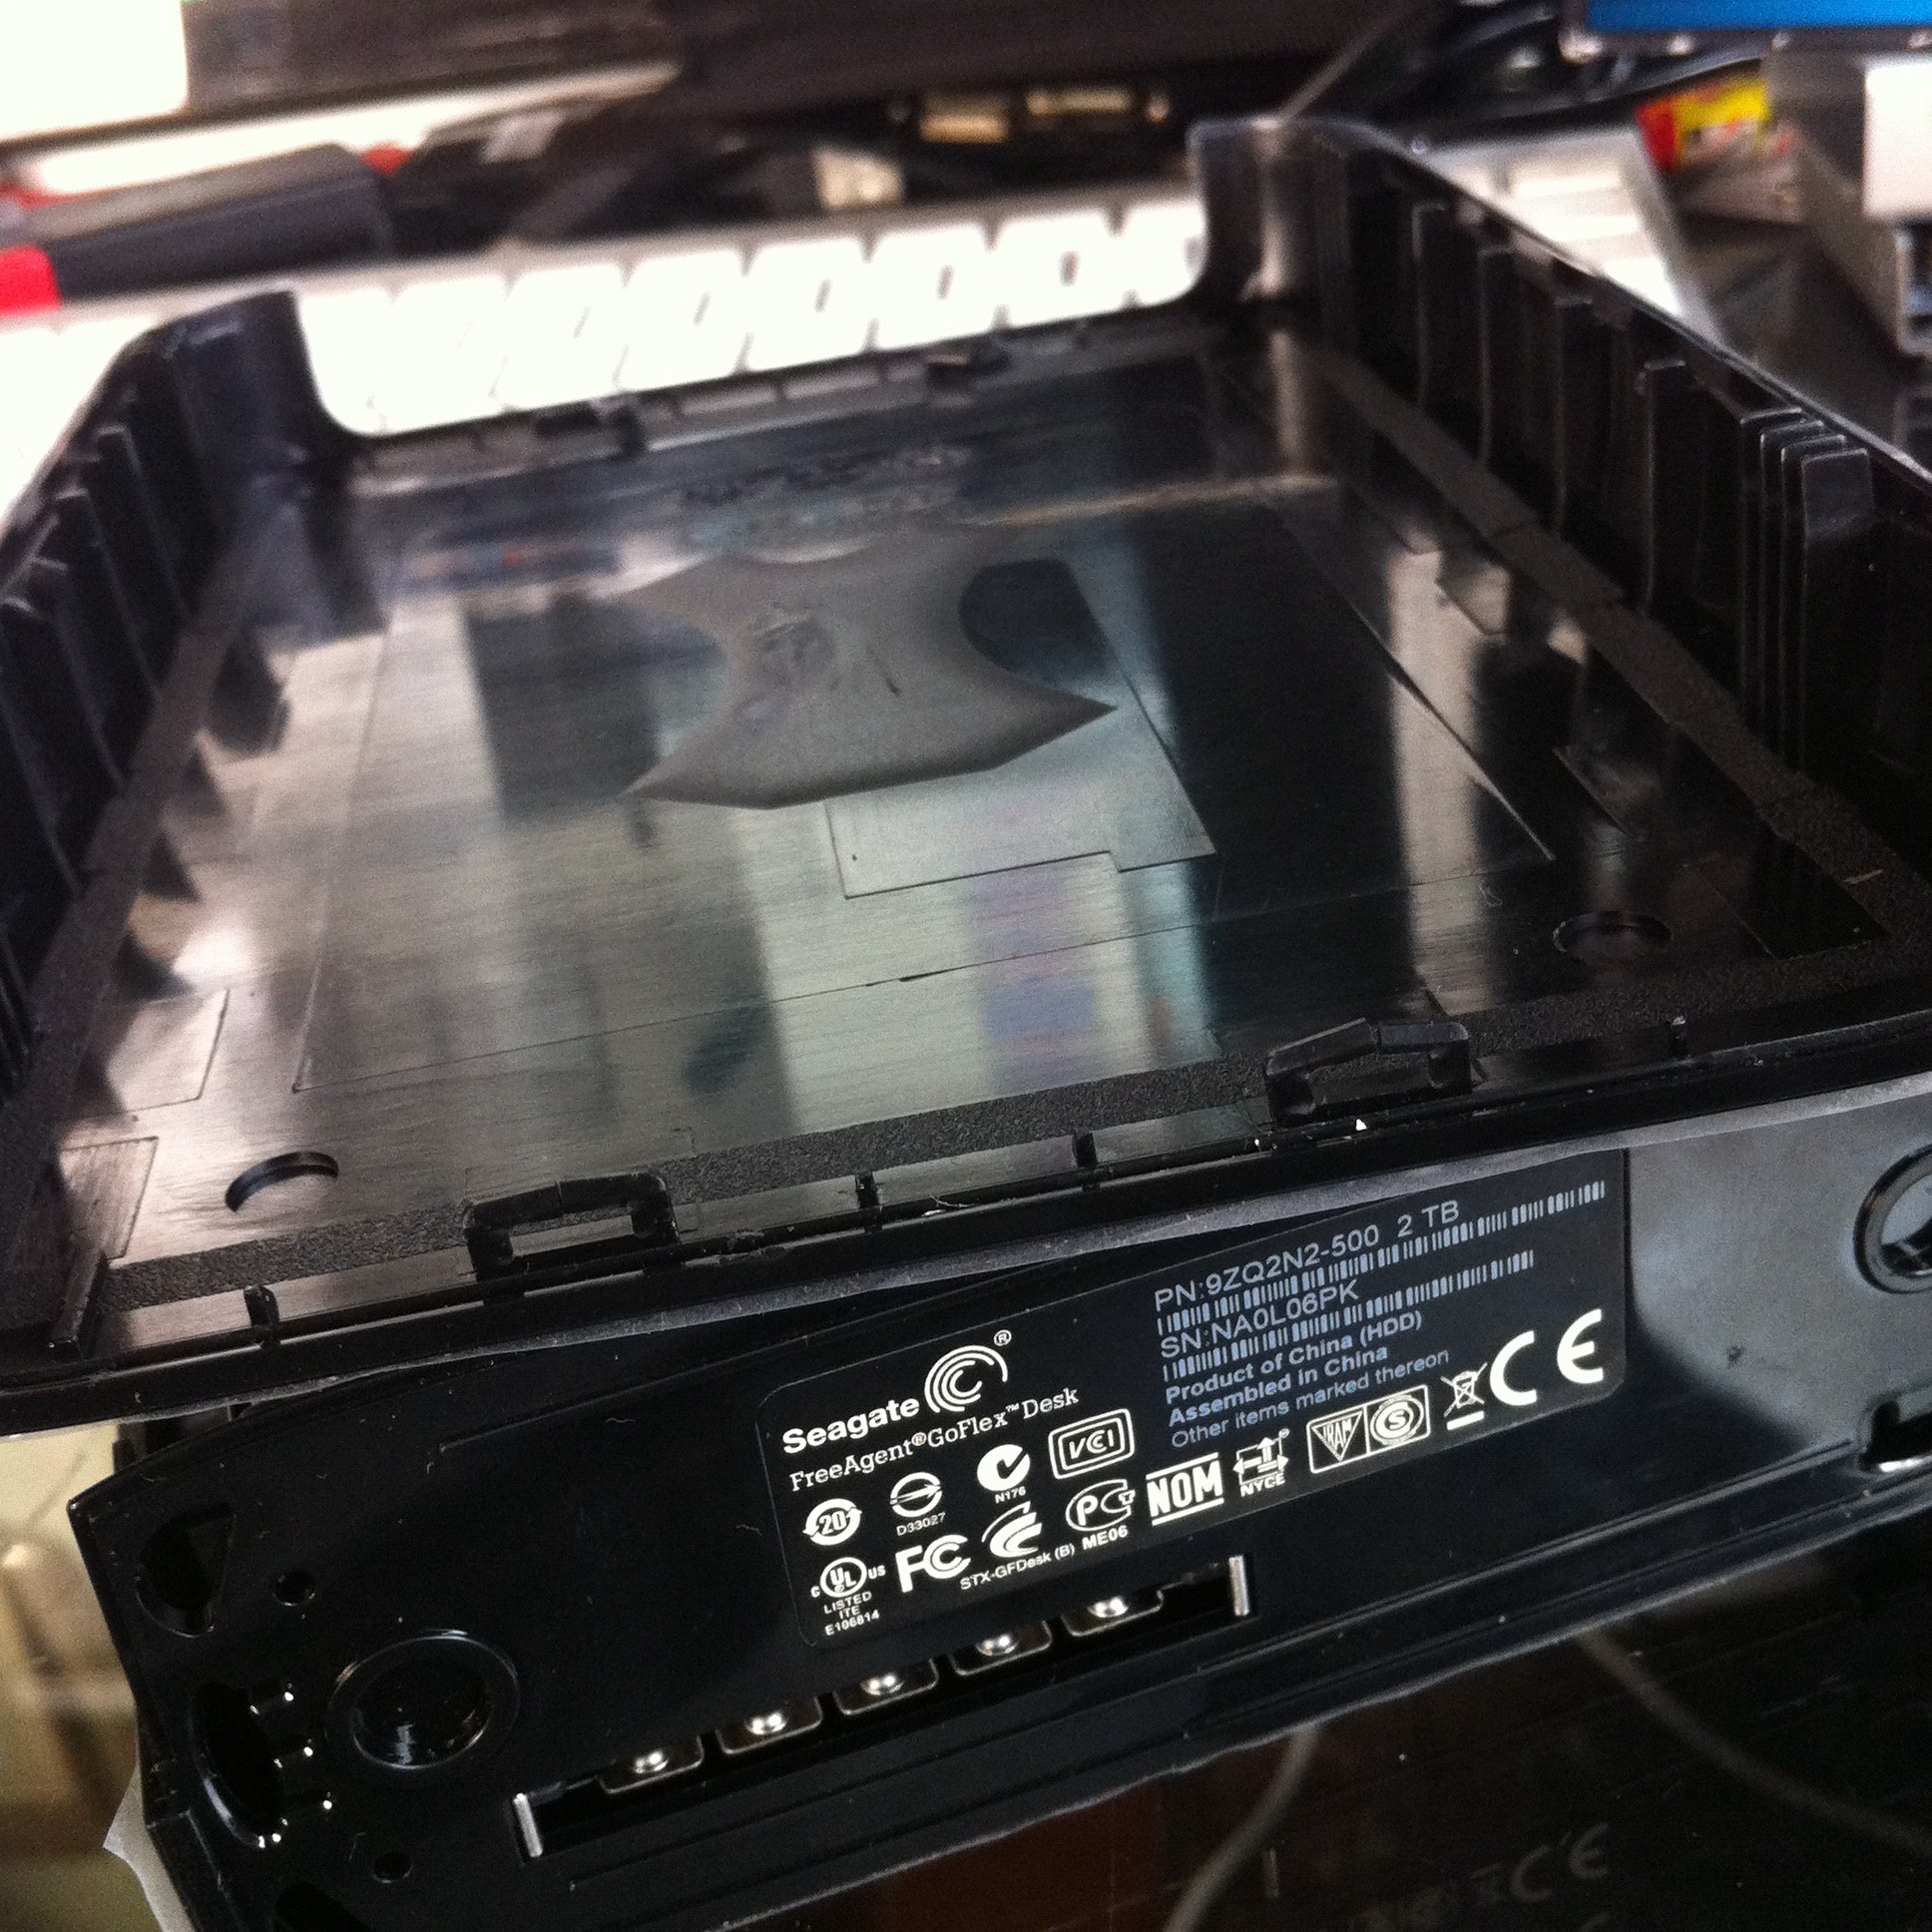
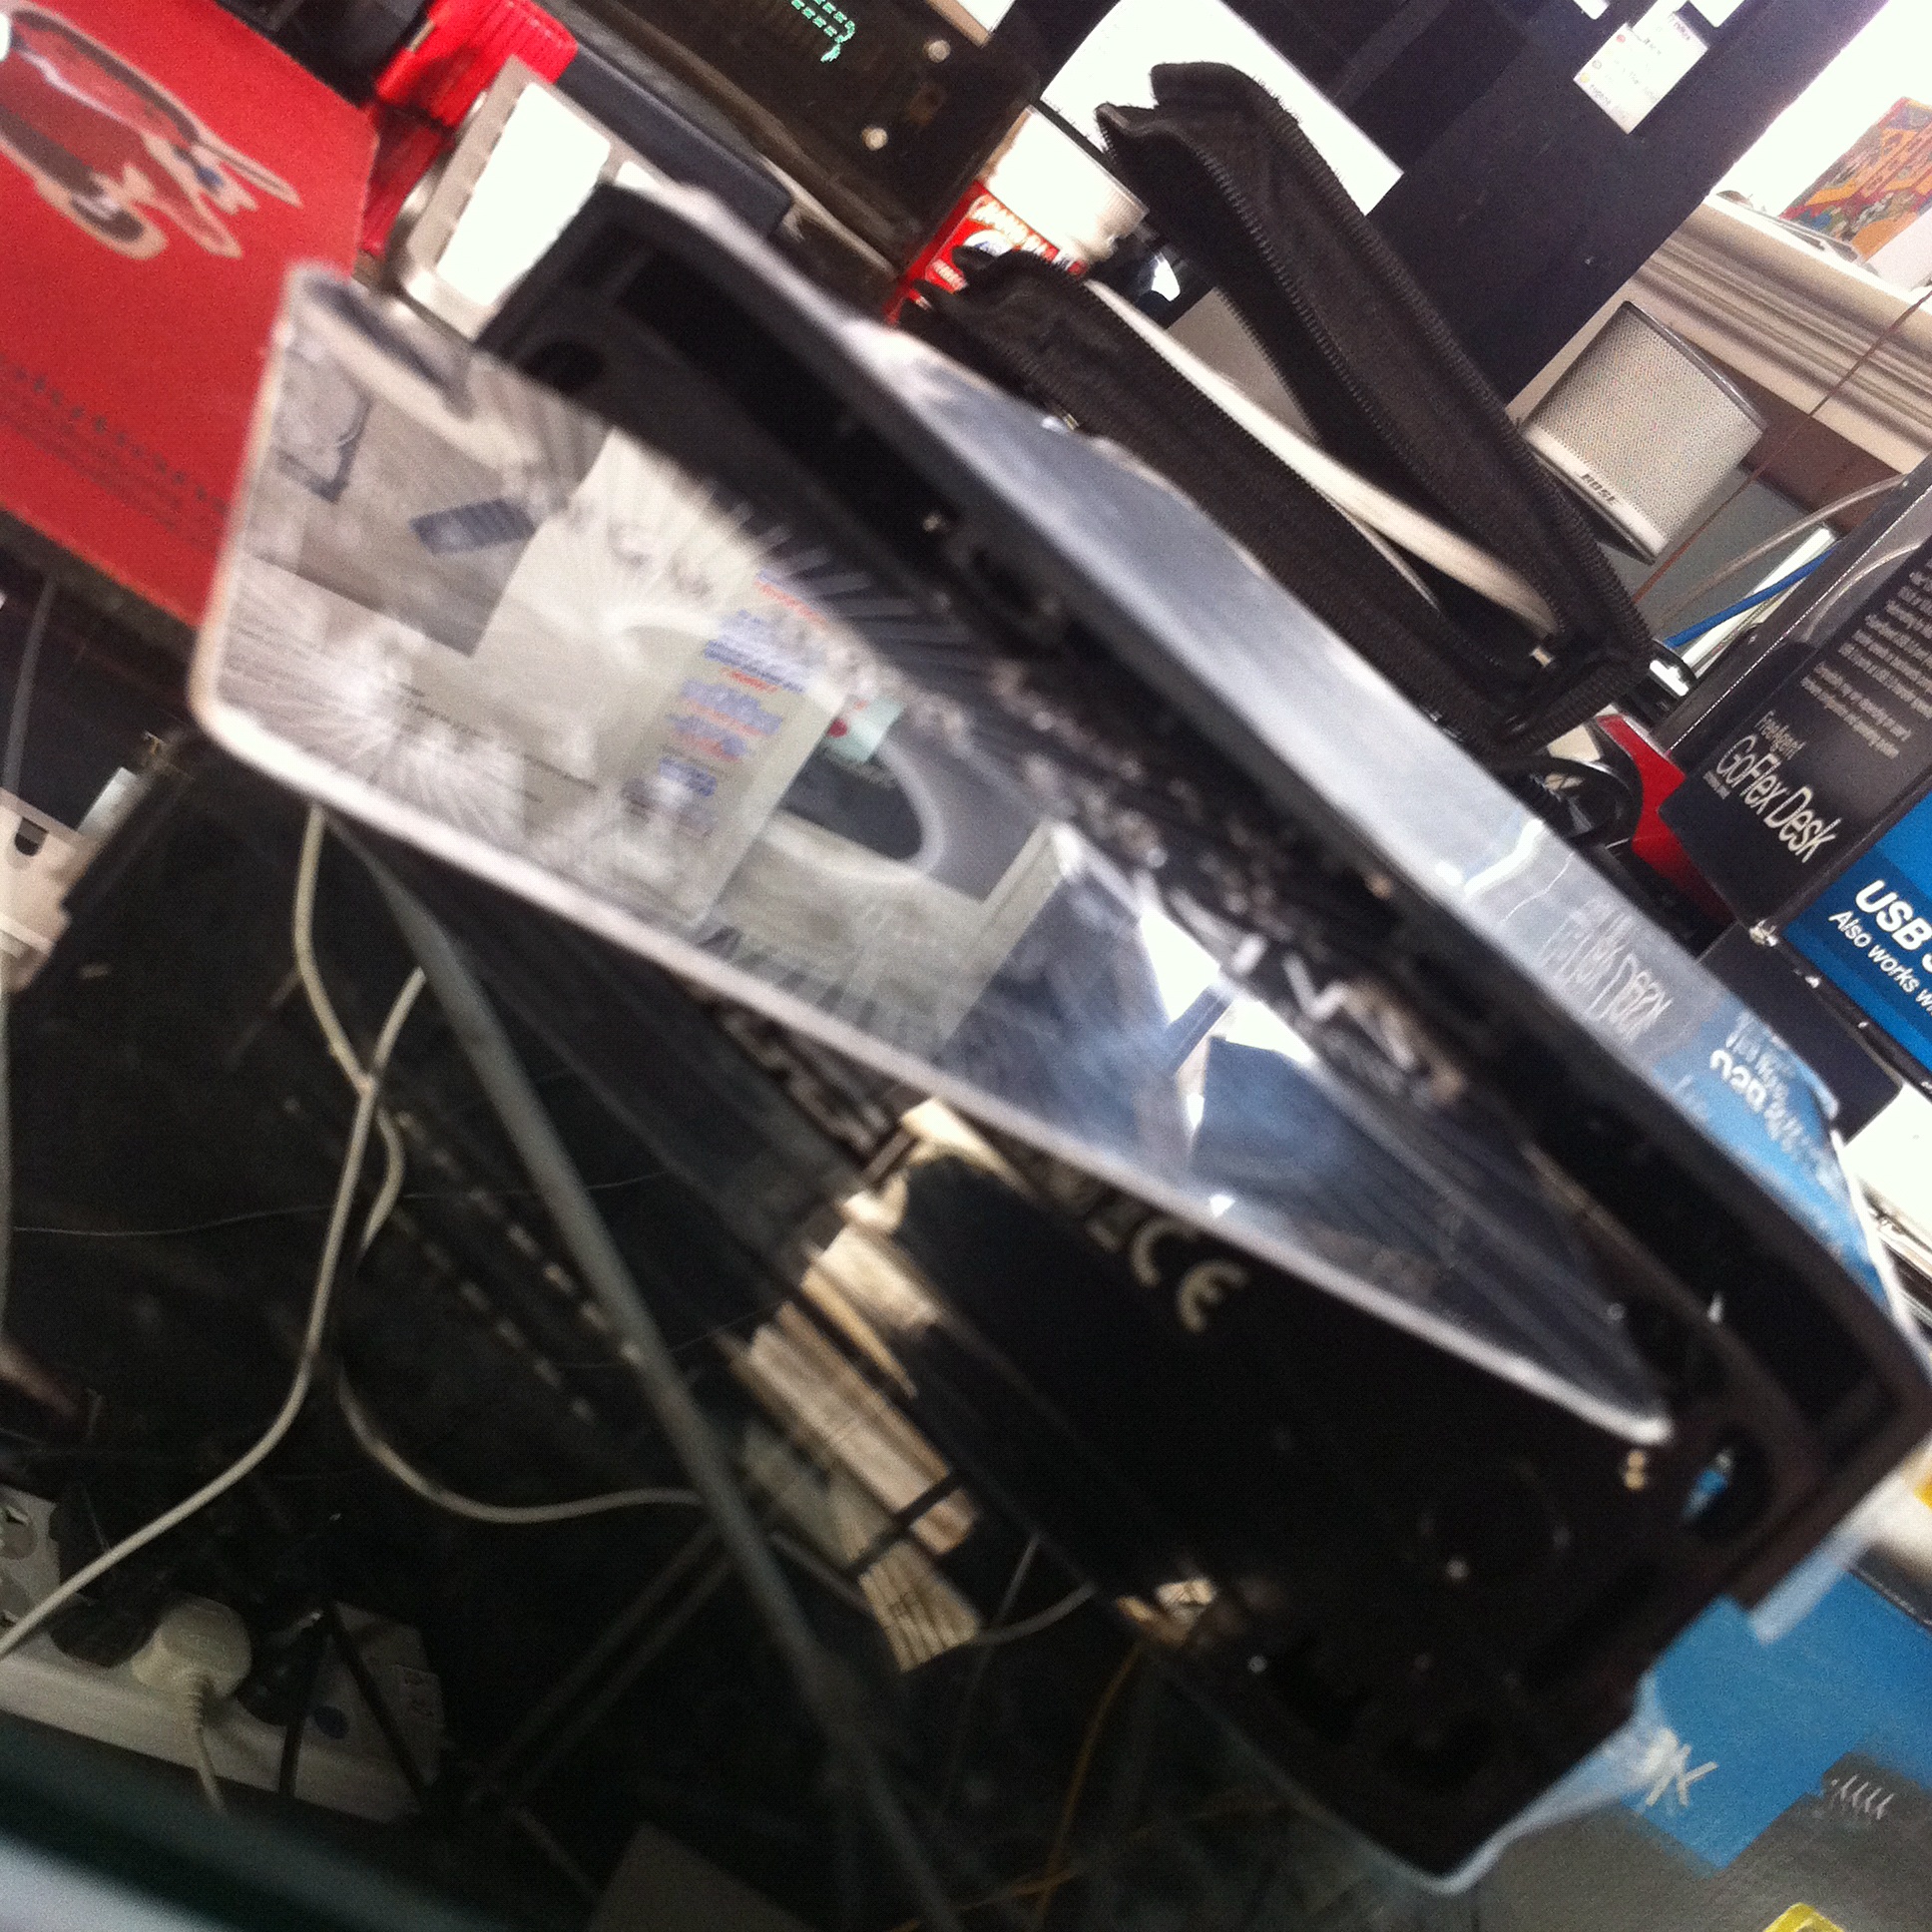
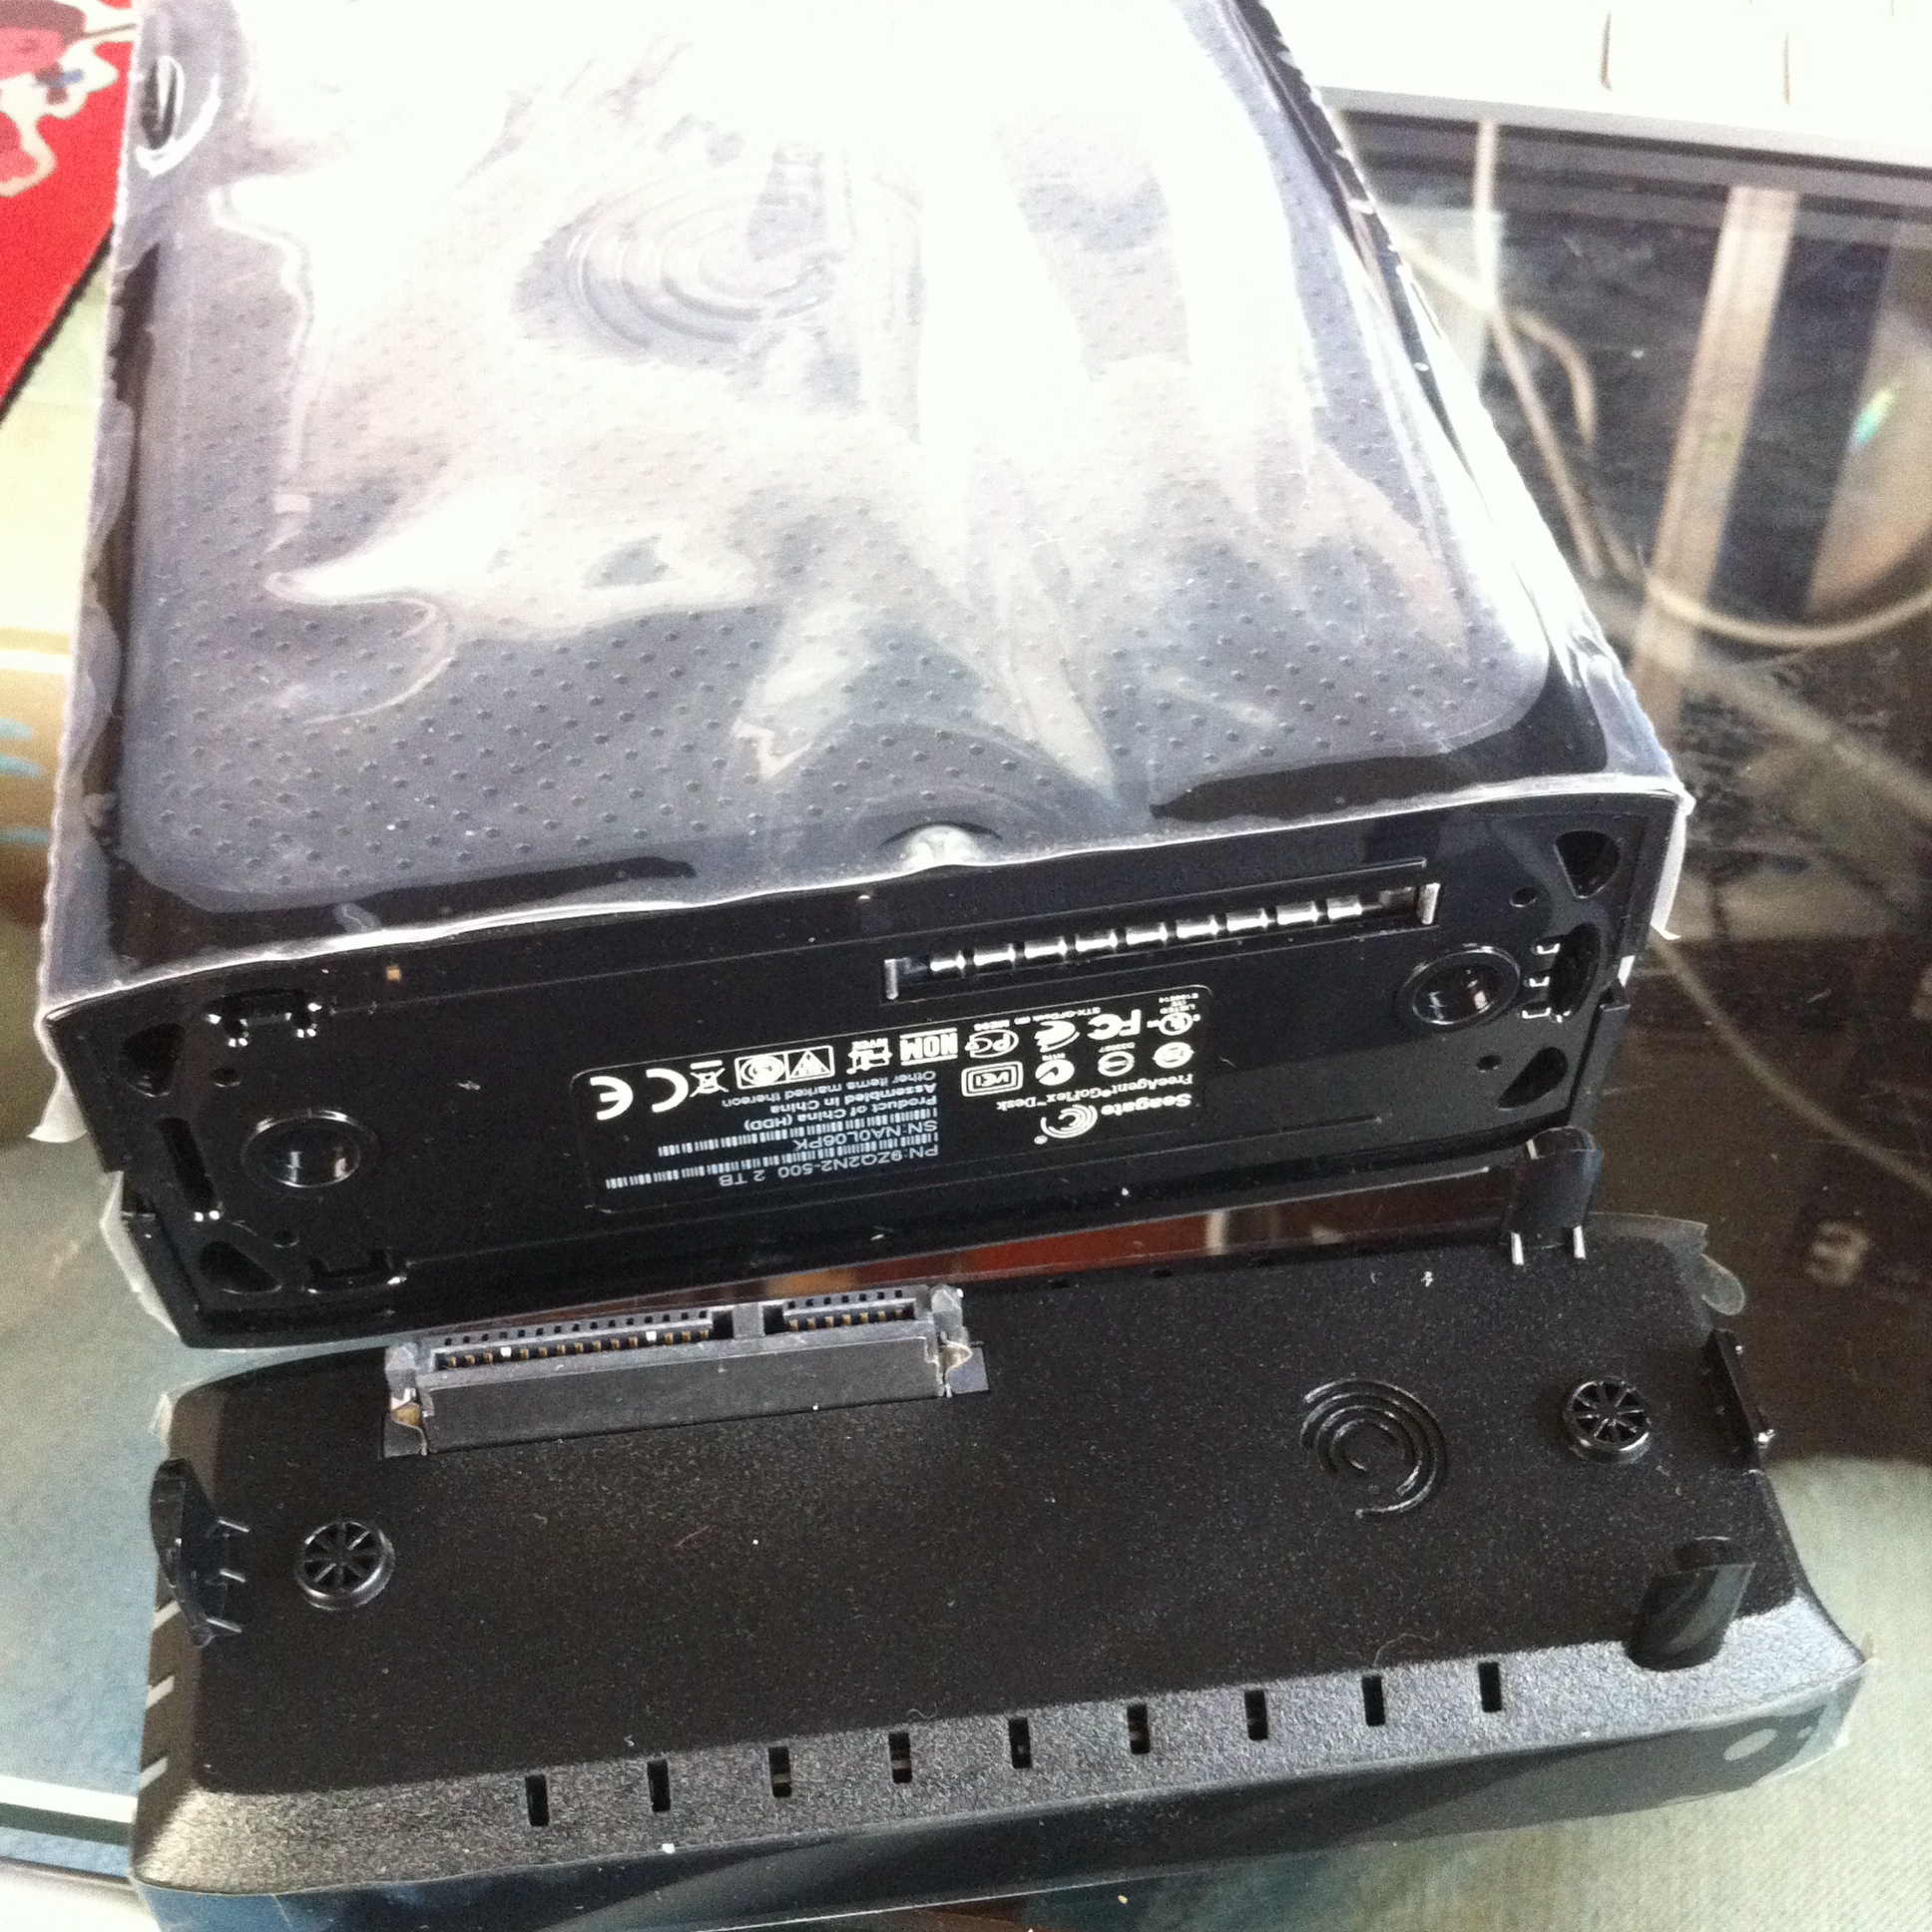
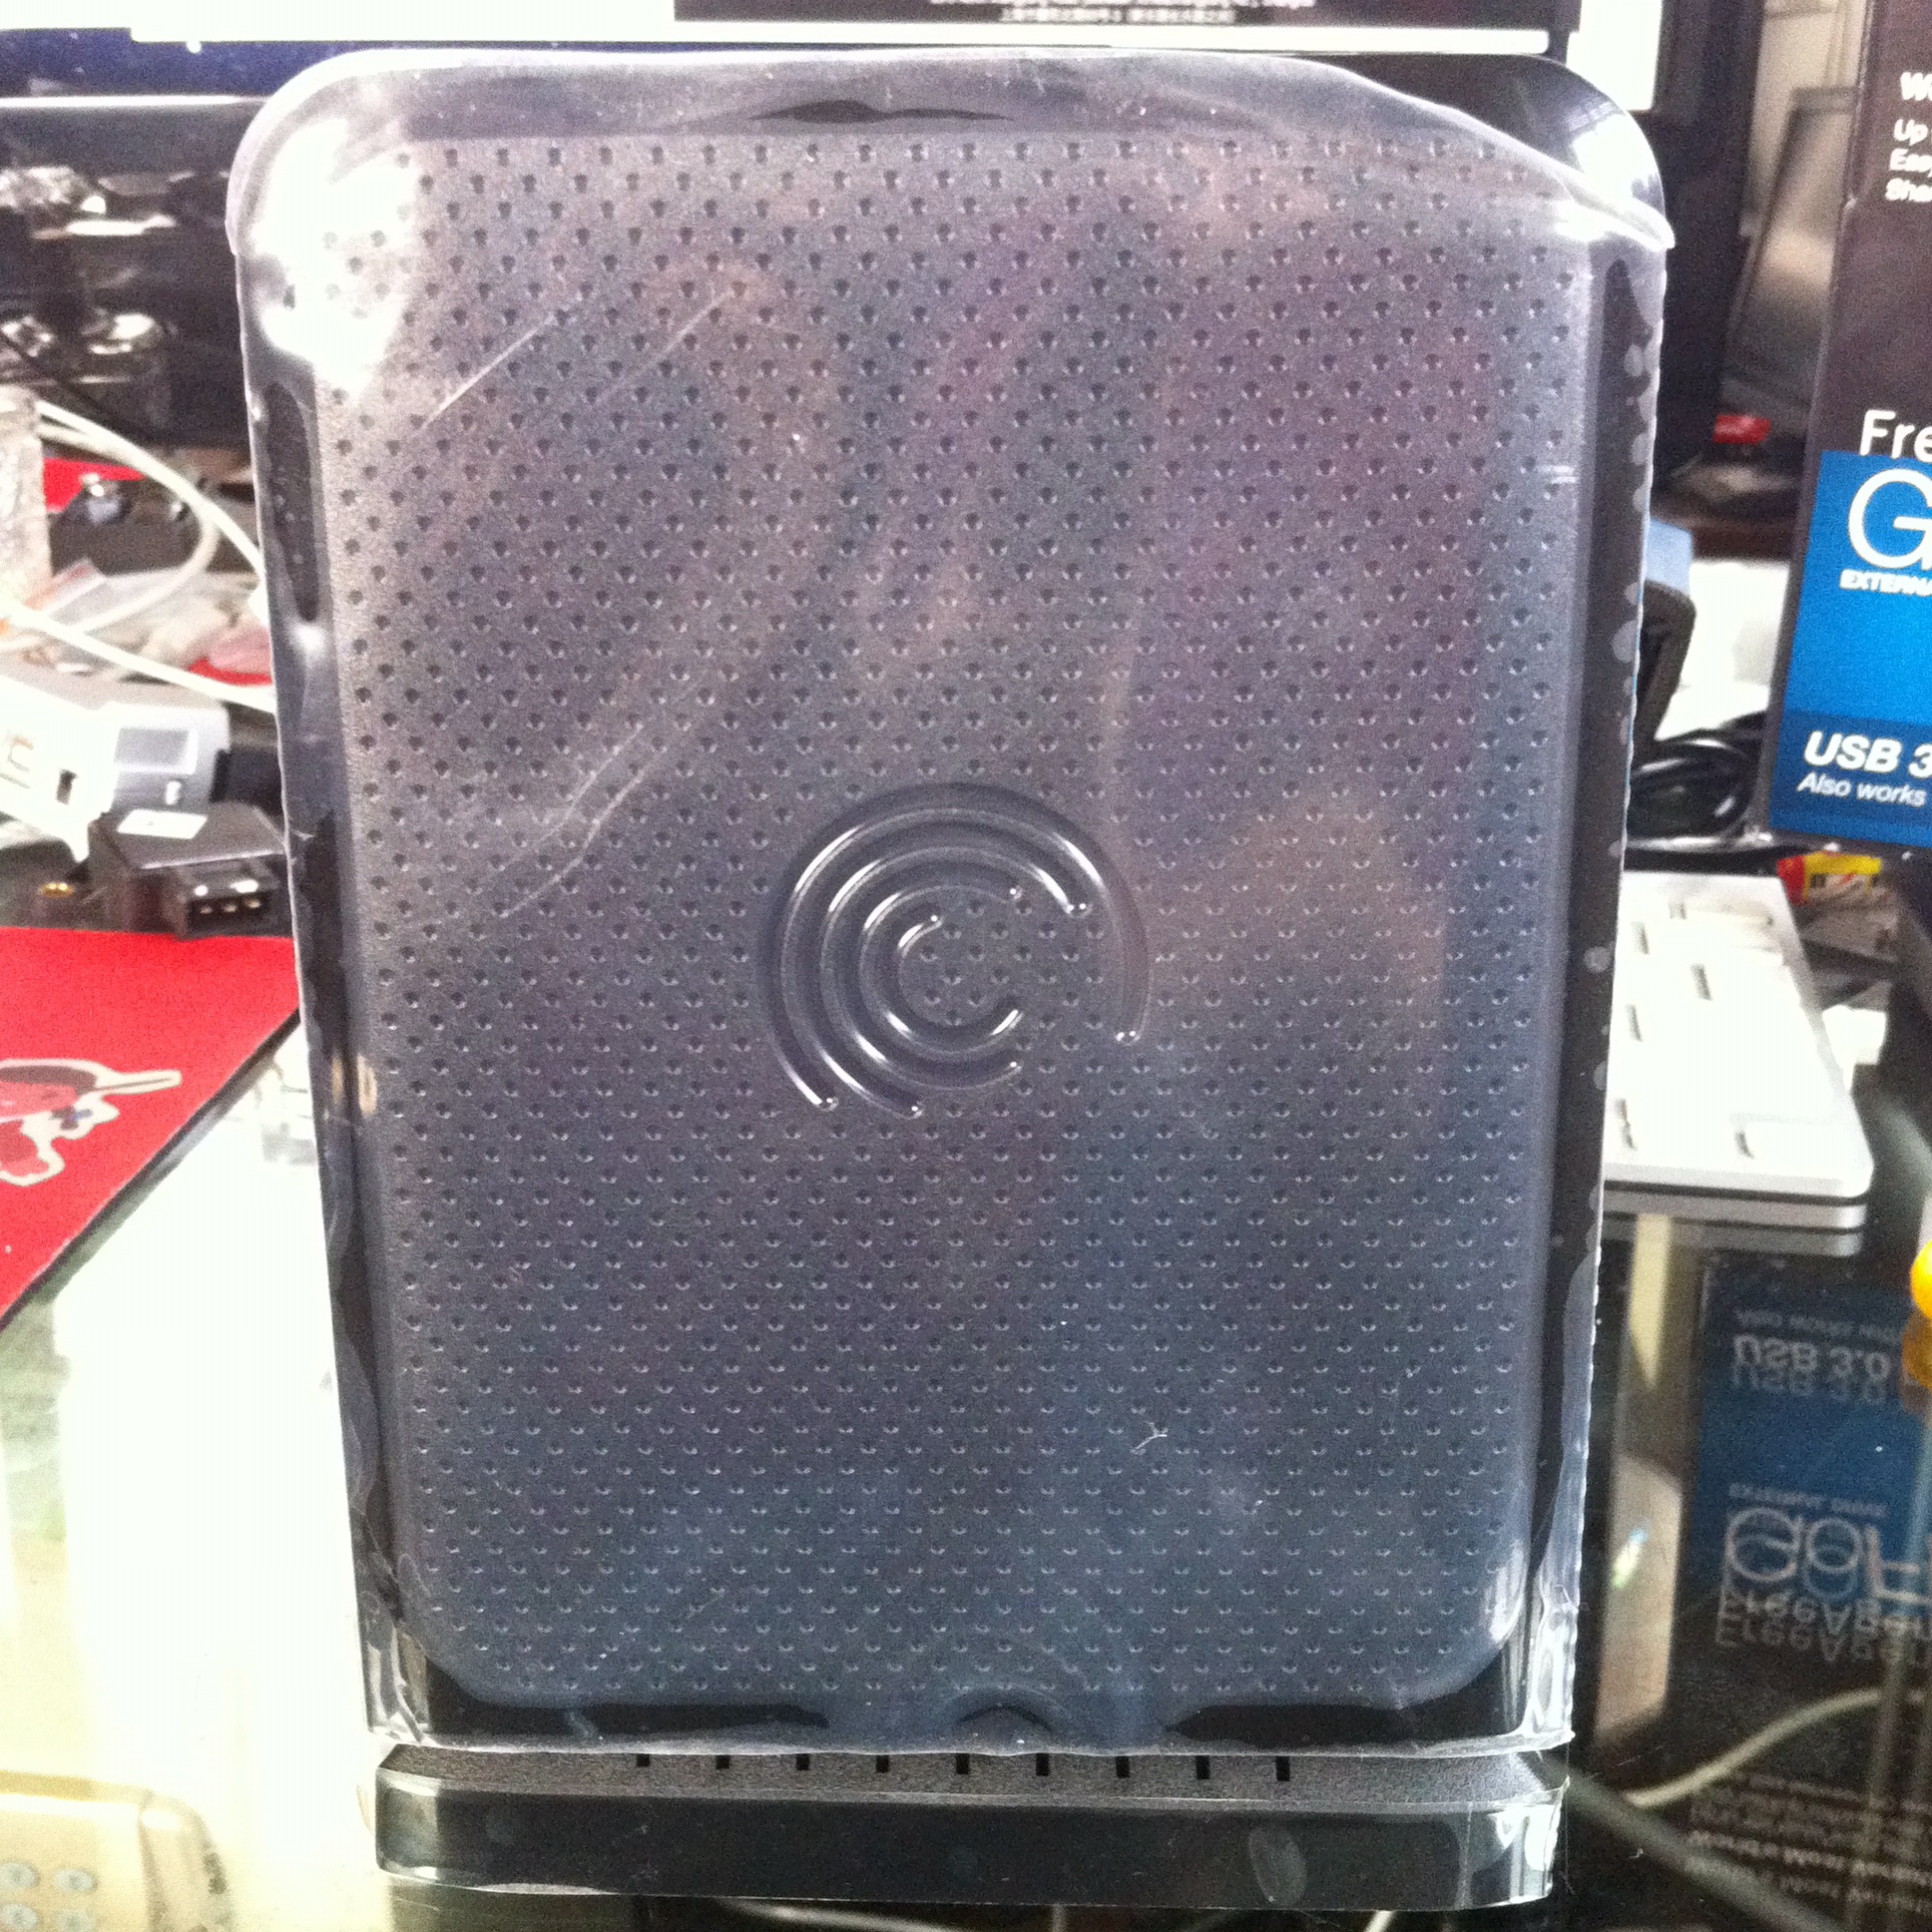
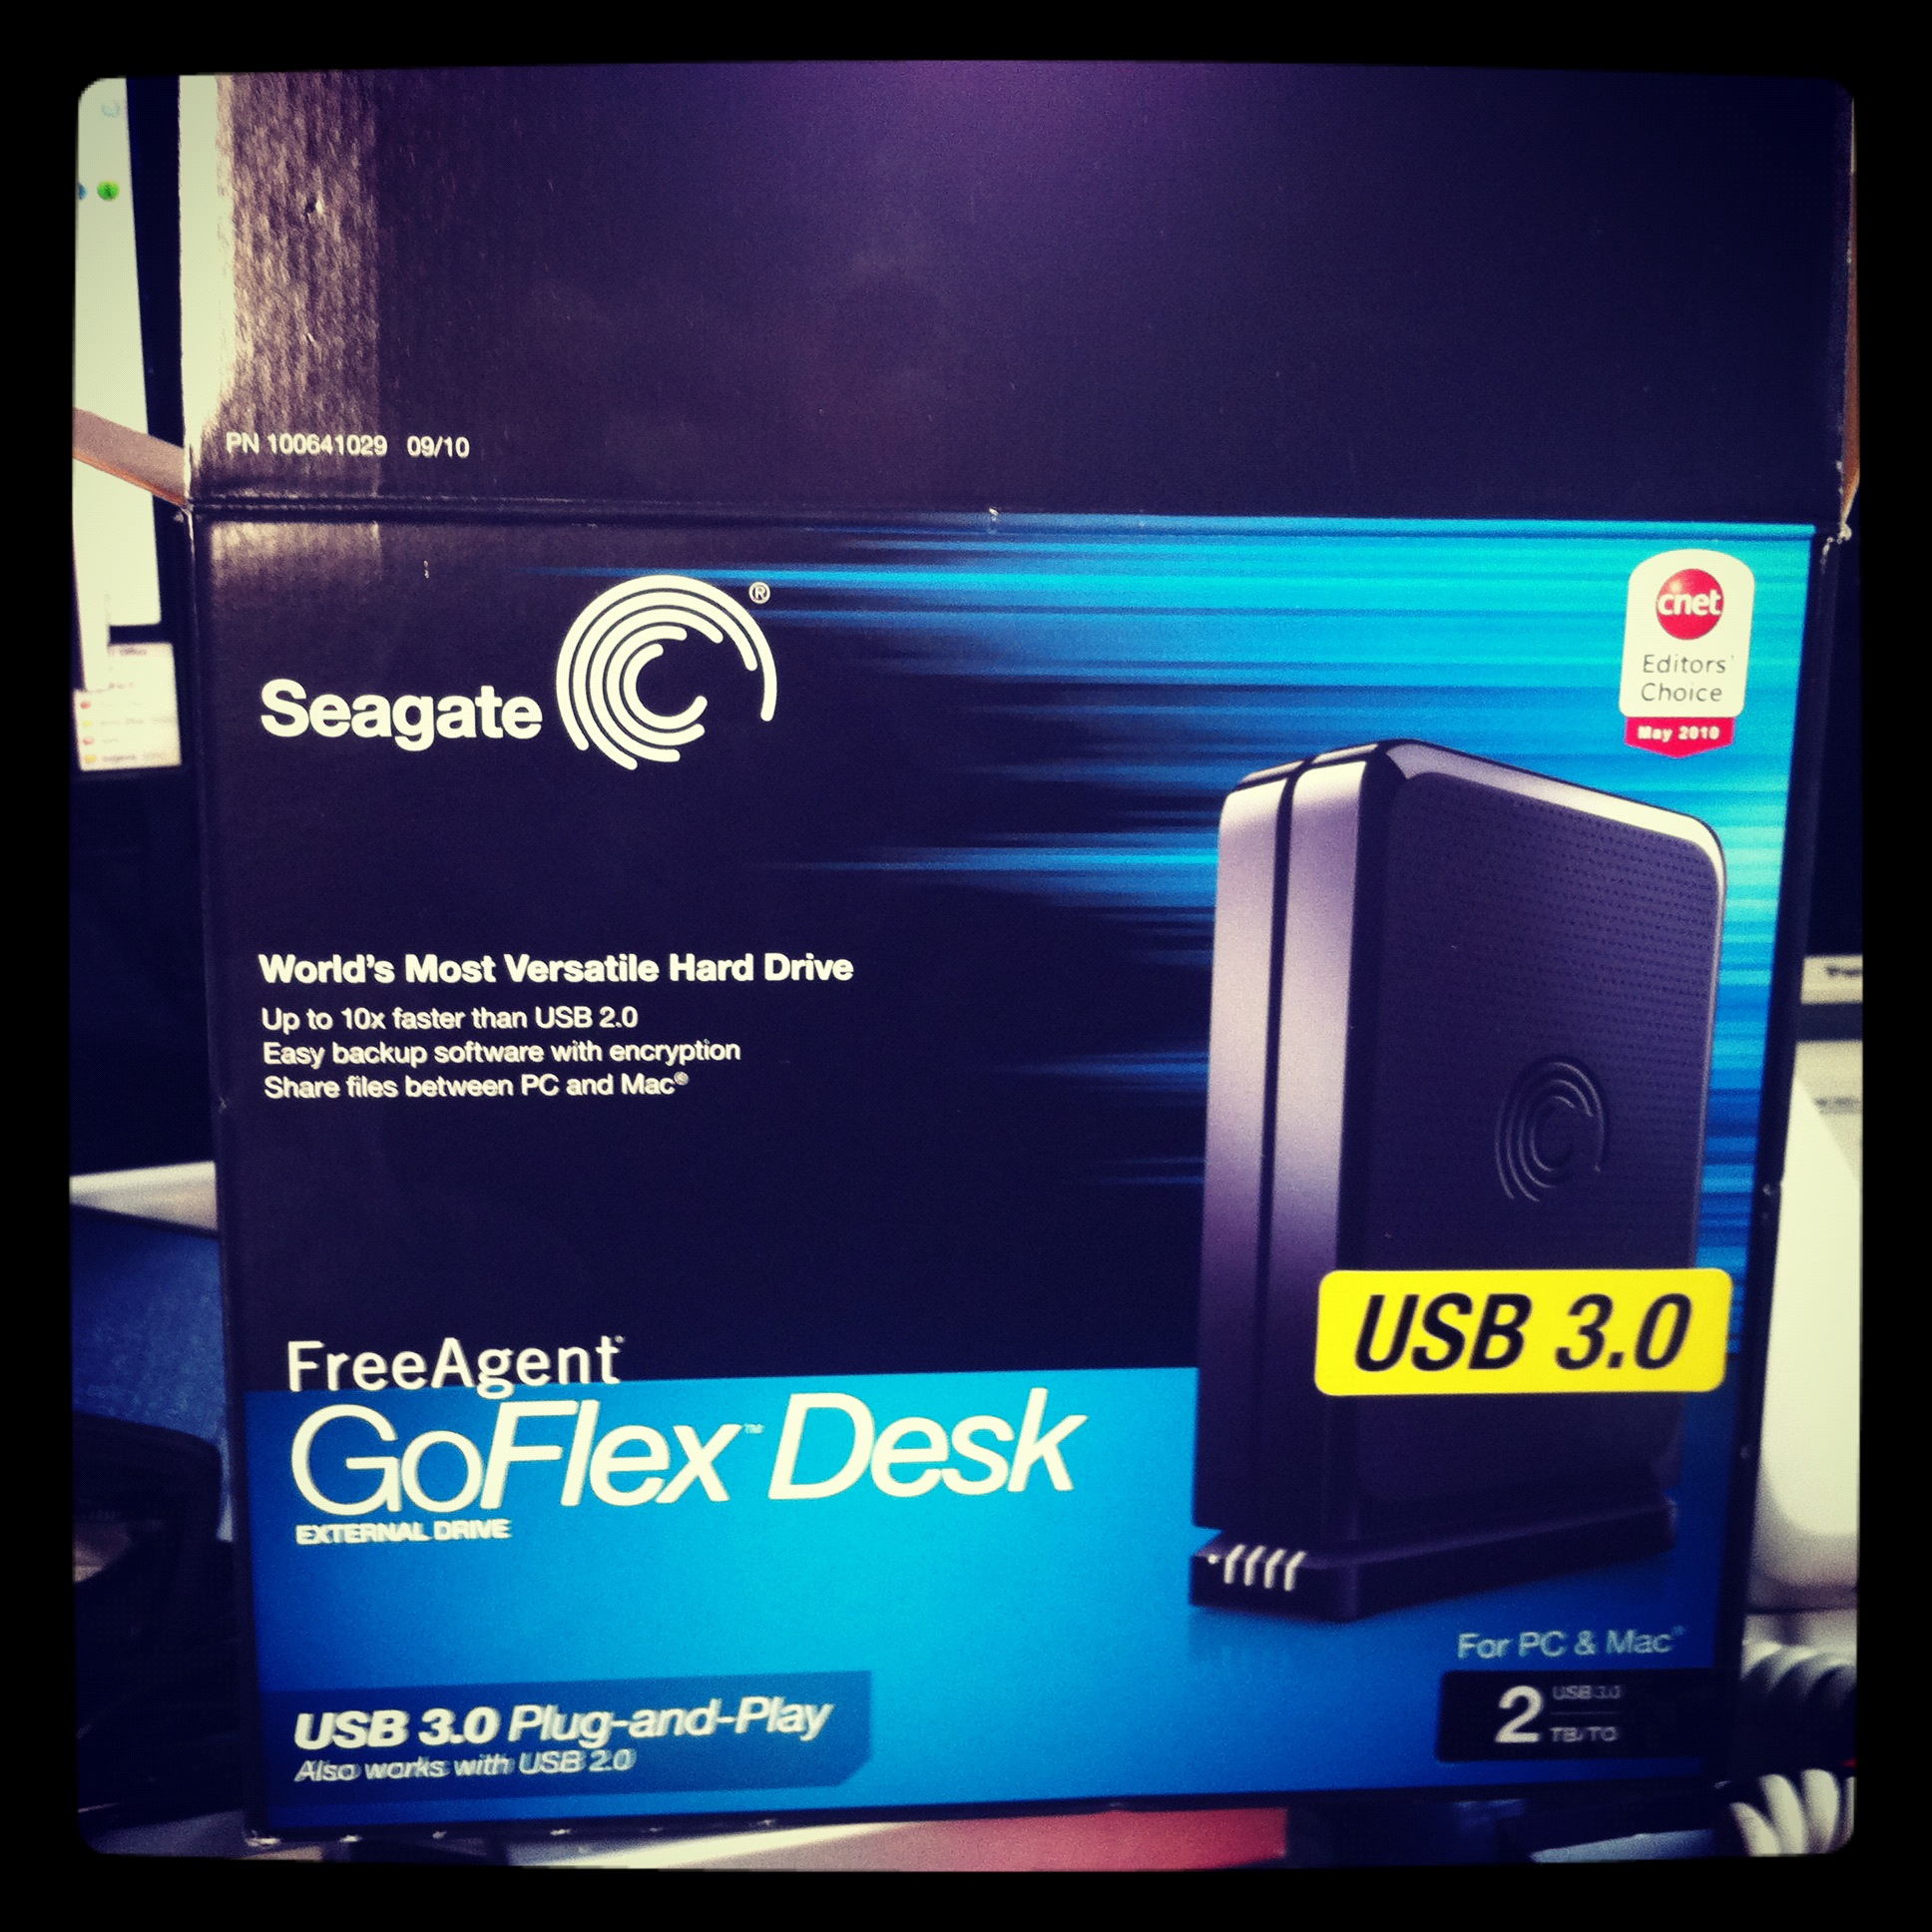
As drive prices have increased somewhat to roughly 200% in price locally over the last few weeks for raw drives, and external drive cases have not, I advised a client recently to purchase an external hard drive to save some money.
The drive case he brought over to me to have installed in his desktop was a Seagate GoFlex drive.
Seagate unfortunately doesn’t use screws to put the case together like other manufacturers, instead they use the dreaded plastic clips to hold the drive case together.
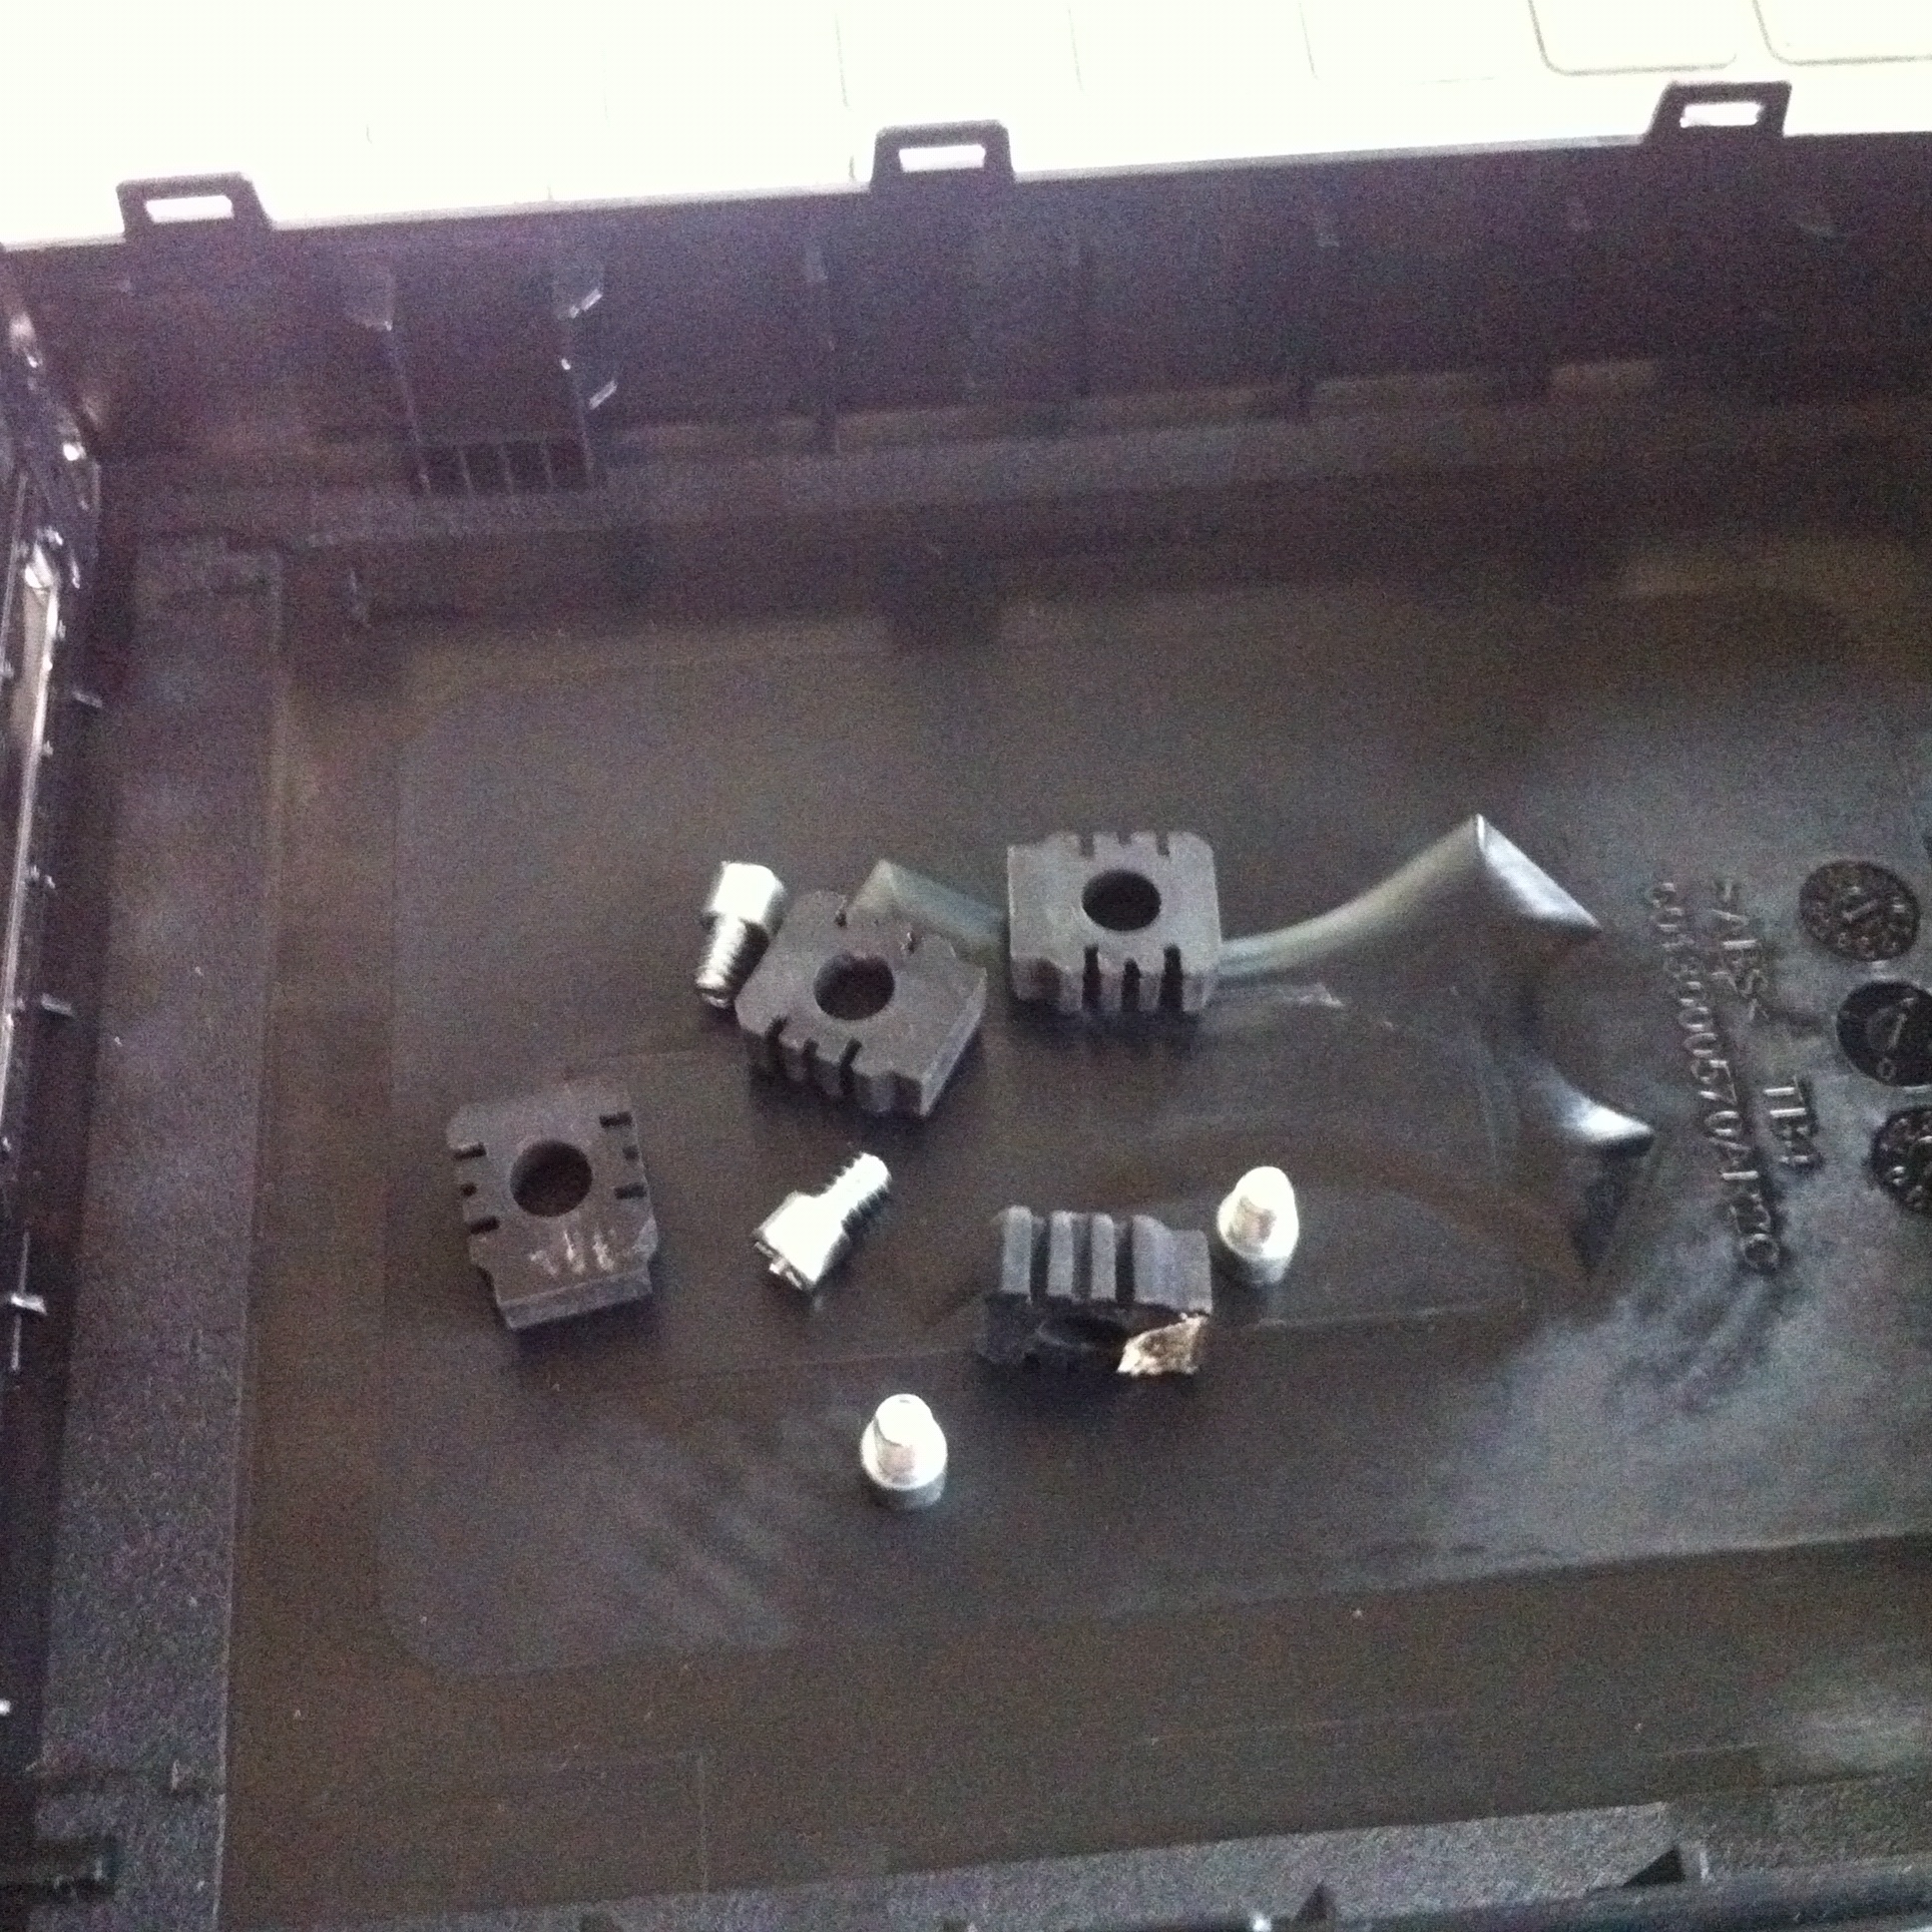
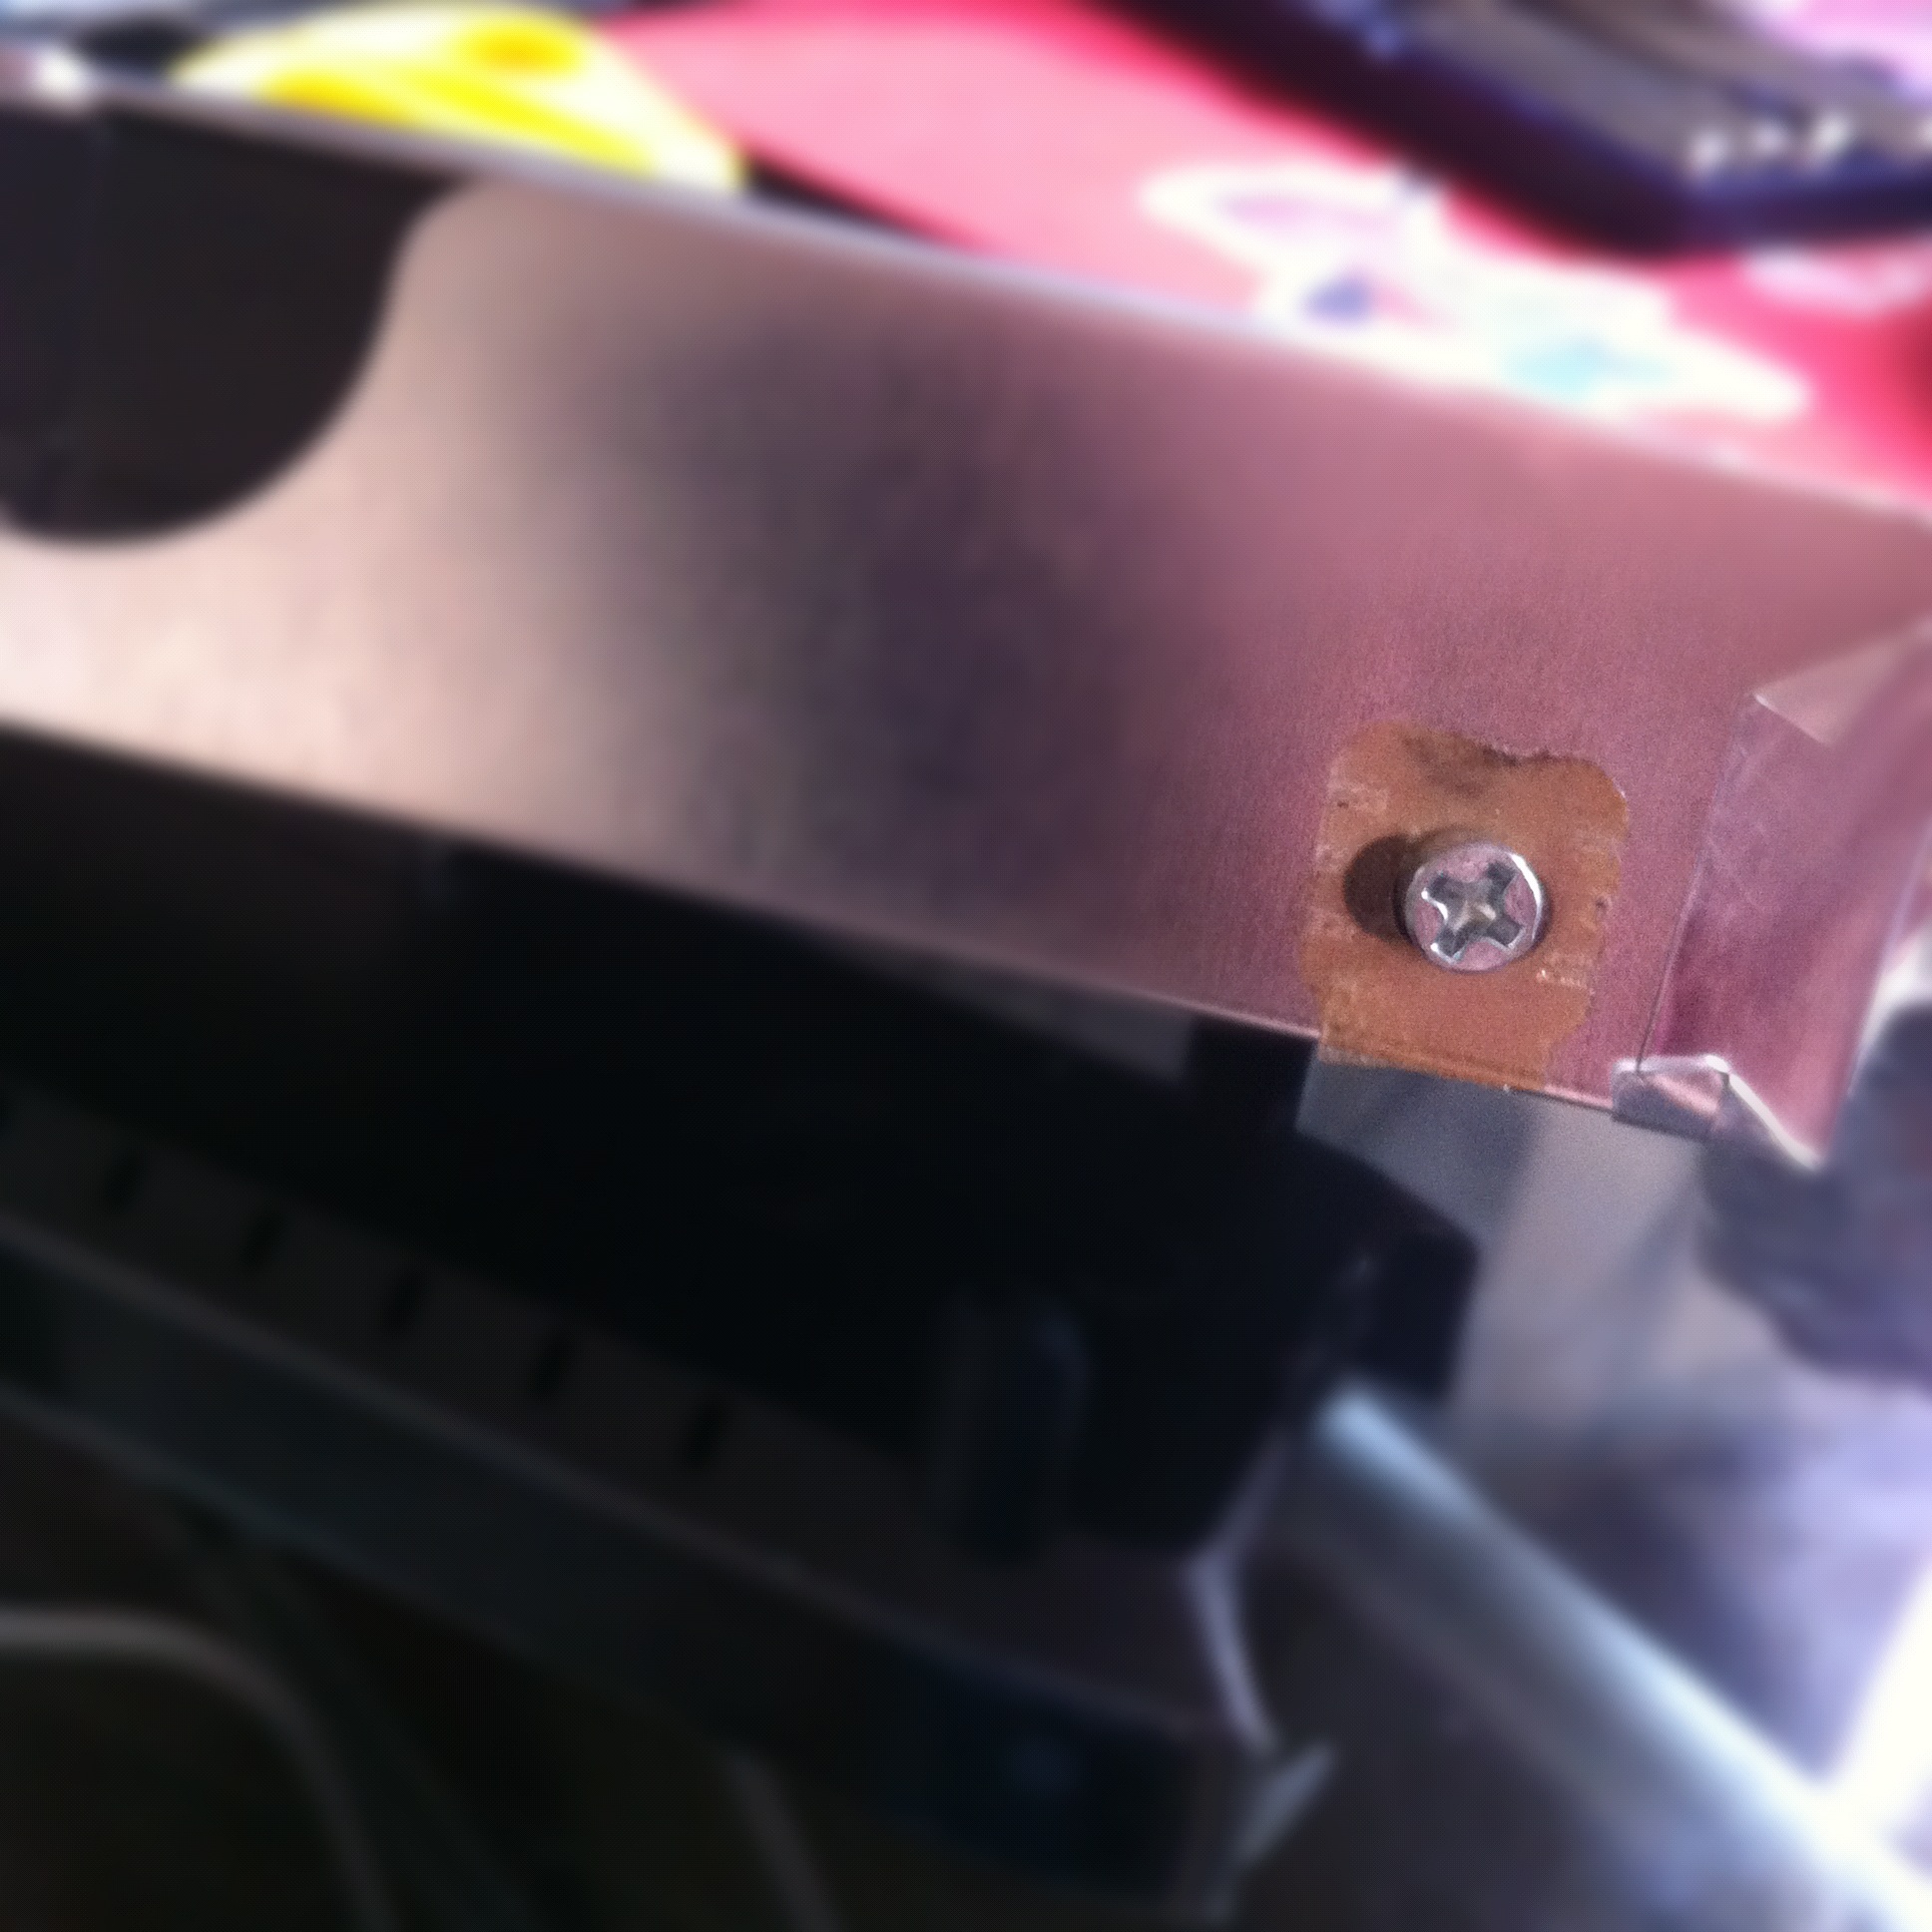
Below is a quick pictorial to safely take apart one of these cases to remove a drive (or swap a broken drive).
Essentially –
1. remove the base (pulls of easily).
2. stick a credit card under the top edge (I used a flat jewel screwdriver to get enough space), and unclip top
3. slide drive out
4. remove plastic feet and unscrew screws.
5. fold down metal sticker and remove drive.
If you get similar messages to this when you use apt-get
perl: warning: Setting locale failed.
perl: warning: Please check that your locale settings:
	LANGUAGE = (unset),
	LC_ALL = (unset),
	LC_CTYPE = "UTF-8",
	LANG = "en_US"
    are supported and installed on your system.
perl: warning: Falling back to the standard locale ("C").
locale: Cannot set LC_CTYPE to default locale: No such file or directory
locale: Cannot set LC_MESSAGES to default locale: No such file or directory
locale: Cannot set LC_ALL to default locale: No such file or directory
and the advice to
dpkg-reconfigure locales
doesn’t work, then try this –
export LANGUAGE=en_US.UTF-8
export LANG=en_US.UTF-8
export LC_ALL=en_US.UTF-8
locale-gen en_US.UTF-8
dpkg-reconfigure locales
Short and sweet solution.
8
Macbook Pro top replacement issue – or how I fixed my Macbook and sorted out the function keys.
I’ve been buying broken Macbook’s in SA when I’ve been home, for repair in China.
My latest purchase is a pre unibody Mac Book Pro that had been dropped – the top case was dented,and the screen shattered.
The LCD was fairly painless to replace – I’ve done quite a few already on various models, and I have a bazillion suppliers for raw panels.
The top case was a little more problematic – I ordered 2 consecutive replacements off of Taobao, but unfortunately the delivery company (ShenTong) destroyed both in shipping. Took about a month to sort that out and find a yet another replacement with explicit instructions please not to send via ShenTong (aka destroyer of parts).
The third case arrived in pristine condition, and I installed the keyboard from the previous case, only to find that the function keys didn’t work, and the caps lock didn’t work.
It wasn’t a hardware issue with the keyboard, as it worked fine in another laptop. I even ordered another one just to make sure.
A bit of googling revealed that the keyboard kext gets the layout from the USB hardware ID present in the top case.
As my top case didn’t quite match up hardware id wise, I was seeing that as an issue.
Fixing this is a bit tricky, but doable.
First up was to find out what the hardware id is for the USB case.
In my case this was as below (snarfed from System Information / USB)
Apple Internal Keyboard / Trackpad:

  Product ID:	0x0231
  Vendor ID:	0x05ac  (Apple Inc.)
  Version:	0,70
  Speed:	Up to 12 Mb/sec
  Manufacturer:	Apple, Inc.
  Location ID:	0x5d200000 / 3
  Current Available (mA):	500
  Current Required (mA):	40
Product ID is the useful bit – 0x0231 = 561 in decimal.
So, we need to lookup 561 in the kext (driver) for the keyboard.
In Lion / Snow Leopard, this is in the AppleUSBTopCase.kext over in System / Library / Extensions.
If you open up that kext, it has the plist for the keyboard layouts over here –
AppleUSBTopCase.kext » Contents » PlugIns » AppleUSBTCKeyEventDriver.kext » Contents » Info.plist
Open up the Info.plist, and look for the Product ID that matches your Product ID – in my case 560.
The key FnFunctionUsageMap contains the mapping for the keyboard. In my case I had to change it to this:
FnFunctionUsageMap
0x0007003a,0x00ff0005,0x0007003b,0x00ff0004,0x0007003c,0x000c00e2,0x0007003d,0x000c00ea,0x0007003e,0x000c00e9,0x0007003f,0x00070083,0x00070040,0x00ff0006,0x00070041,0x00ff0007,0x00070042,0x00ff0009,0x00070043,0x00ff0008
Each value is a pair – first the key number, then the value to set it to.
0x0007003a = F1
0x0007003b = F2
…
My above settings are for
F1 = brightness down
F2 = brightness up
F3 = mute
F4 = volume down
F5 = volume up
F6 = num lock
F7 = Expose
F8 = Keyboard Light off
F9 = Keyboard Light down
F10 = Keyboard Light Up
F11 = n/a
F12 = n/a
I got these values from here –
// usage IDs from the hid
#define FF_BRIGHTNESS_DOWN_ID_LAPTOP @”0x00ff0005″ // for laptops
#define FF_BRIGHTNESS_UP_ID_LAPTOP @”0x00ff0004″ // for laptops
#define FF_BRIGHTNESS_DOWN_ID_EXTERNAL @”0xff010021″ // for external keyboards
#define FF_BRIGHTNESS_UP_ID_EXTERNAL @”0xff010020″ // for external keyboards
#define FF_EXPOSE_ID @”0xff010010″
#define FF_DASHBOARD_ID @”0xff010002″
#define FF_ILLUMINATION_TOGGLE_ID @”0x00ff0007″
#define FF_ILLUMINATION_DOWN_ID @”0x00ff0009″
#define FF_ILLUMINATION_UP_ID @”0x00ff0008″
#define FF_VIDEO_MIRROR_ID @”0x00ff0006″
#define FF_REWIND_ID @”0x000C00B4″
#define FF_PLAYPAUSE_ID @”0x000C00CD”
#define FF_FASTFORWARD_ID @”0x000C00B3″
#define FF_MUTE_ID @”0x000C00E2″
#define FF_VOLUME_DOWN_ID @”0x000C00EA”
#define FF_VOLUME_UP_ID @”0x000C00E9″
Once I’d done that, I also needed to rebuild (or in my case build), the Kext cache so that the OS would use it on next reboot.
Heres how to do that in Lion
sudo kextcache -v 1 -a i386 -a x86_64 -m /System/Library/Caches/com.apple.kext.caches/Startup/Extensions.mkext /System/Library/Extensions
…oh, and lastly, reboot of course!
Post reboot my function keys were working normally.
The caps lock key is still non-functional, but I’m ok with that, as its means a bit more work for little effort.
I may look into setting up a special plist to override the usb_id its getting from the hardware via the method here –http://www.projectosx.com/forum/index.php?showtopic=798
..but again, time vs effort…
Still, my Macbook is working now more or less, so its good enough for me 🙂
Of course, subsequently to doing this the hard way, I found a program to do it all for me!
http://pqrs.org/macosx/keyremap4macbook/
Suggest unless you are a masochist, use that!
We use xcache as a php caching mechanism on our servers.
Its pretty painless for us for the most part.
One of our clients did complain that their app was now crapping out.
A check of the software forums for that app (ActiveCollab) showed that it was an issue with PHP5.3.2 and XCache and ActiveCollab.
So, needed to disable Xcache.
This should be relatively easy I thought, but the documentation sucks, so took a while to find out how.
Its pretty simple to do though.
Assuming you’ve allowed htaccess files in apache, you can do the below –
Add an htaccess file in the root folder of the website with the following info
php_flag xcache.cacher Off
php_flag xcache.size 0
php_flag xcache.stat Off
Thats it.
We’ve been using MODx for a number of years now for site development, and one thing that repeatedly comes up in all our sites is how to add Events.
This is actually pretty easy within MODx, as you’ll see.
Ditto and CALx are two plugins that make this doable.
First up, I recommend you setup a folder for the events to be held in. I usually sit this outside of the main site tree, and set it to be not shown in the menu.
Lets call this the Events Folder.
Heres one I made earlier that has some events inside.

Lets not get ahead of ourselves though.
So, now we have a folder to place stuff into.
Next, we need some details for our events.
At a minimum, we’ll need an Event Start Date, and End Date (although to be honest, most clients don’t use that many fields).
So, lets setup 2 Template Variables called… EventStartDate, and EventEndDate.
As we’ll be using Ditto and CALx, we need to tell MODx to use UnixTime for these, so that we can sort with them later. Make a new Template Variable, set the Input Type to Date, and set the Widget to UnixTime.
See below for an example. (do the same for both Template Variables)

Don’t forget to make sure that both template variables are accessible in whatever templates you will be using.
Ok, so now we have a folder, and two template variables.
Lets make some data.
Go to the Events folder you created, right click, and Create New Resource Here.
You should see the two template variables we created listed in the page. Set them to something appropriate.

Save the page.
Create another few entries with different dates so we’ll have something to sort by.
You should now have a folder, our template variables, and some sample data.
At this point we’ll need to make a chunk so that we can display the output of running Ditto against our data.
Make a new Chunk,call it chkShowEvent, and put this inside.
Title: [+title+]
Start: [+EventStartDate:date=`%d-%b-%y %H:%M`+]
End: [+EventEndDate:date=`%d-%b-%y %H:%M`+]
(You’ll note that we’re formatting the UnixTime based data automagically by using MODx’s built in formatting functions.)
Neat huh.
Ok, so now we have almost all our details together.
All we need now is to create some code to show off the data.
If you recall way back to the top of this page, we setup a Start Date and an End Date.
Our Start Date is called EventStartDate.
Lets make some code to show off a single event using Ditto.
[!Ditto? &startID=`4` &tpl=`chkShowEvent` &displayArchive=`0` &multiLevel=`1` &paginate=`0` &paginateAlwaysShowLinks=`0` &orderBy=`EventStartDate ASC` &extenders=`summary,dateFilter` &dateSource=`EventStartDate` &summarize=`1` &dateFormat=`%d. %b. %y` &filter=`EventStartDate,@EVAL return strtotime("now");,3`!]
Looks complicated, doesn’t it!.
Actually not that bad, what we’re doing is telling Ditto to give us one single result, ordered by date.
We then tell Ditto to filter out anything thats older than the current time/date.
This gives us one single result – our most recent upcoming event.
IMPORTANT – The StartID needs to be the same one that YOU are using. Make sure that your folder number and the Ditto call number match. My folder ID is 4, so I’m using 4. You’ll need to use whatever number shows in your MODx.
Ah, I hear you say, but how do I show more than one upcoming event?
Easy peasy. We’ll also need to add a little piece of code for the pagination underneath our Ditto call, so don’t forget to do that.
This Ditto call will show you a listing of upcoming events in date order (past events won’t be displayed)
[!Ditto? &startID=`4`&tpl=`events` &showInMenuOnly=`1` &displayArchive=`0` &multiLevel=`1` &paginate=`1` &paginateAlwaysShowLinks=`1` &orderBy=`EventStartDate ASC` &extenders=`summary,dateFilter` &dateSource=`EventStartDate` &summarize=`5` &dateFormat=`%d. %b. %y` &filter=`EventStartDate,@EVAL return strtotime("now");,3`!]

[+previous+] [+pages+] [+next+]
Again, remember to make sure that startID is the one YOU are using.
Ok, so thats pretty straightforward. Where does CALx come in?
Well, most of the time, people want a Calendar as well as an events listing.
As we’ve created the EventStartDate and EventEndDate as UnixTime, CALx doesn’t need any special help.
Here’s a sample call using the fields we’ve made
[!CALx? &getFolder=`4` &idMultiEvent=`4` &lang=`english` &useTV=`true` &dateStartTVName=`EventStartDate` &dateEndTVName=`EventEndDate` &showOtherMonth=`both` &getTypeProcess=`createCal` &popupType=`3`!]
This will show a calendar for the current month on the page its used on, and list the events for that month. Again, make sure that the folder id that YOU need is used – change getFolder=`4` to your folder ID.
Read up on CAlx, and Ditto at the MODx site for a rundown on the various parameters used.
This should give you an idea of how to setup and use them though.
Good luck.
Feel free to ask questions.
My coffee machine decided it would give up the ghost a while ago (due to lack of use I think).
I tried descaling, but that wasn’t working, and from what I could see (or hear in my case) happening looked like something simple had happened – one of the hoses had come off or wasn’t completely on, as not enough water was coming through the front, and the bottom had a small leak.
As I have successfully fixed other coffee machines in the past with similar issues, I thought I’d have a go at repairing mine.
First up was a quick google for my machine (Krups Cube XN5005) – unfortunately most of the posts were of people with similar issues, and no help.
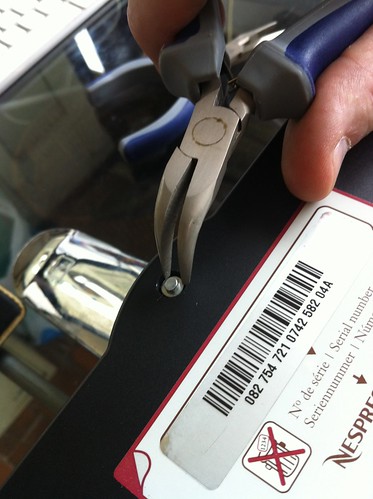
I brought the machine to the office and took a closer look. First issue is that it uses security oval style screws on some of the parts. Thats a pain in the ass, as its hard to find the exact screwdriver.
I drove off to the local tools market and did some shopping around, but no luck, so I bought a selection of needle nosed pliers instead.
There is zero reason to use security screws unless you’re trying to piss off the consumer. If I’ve bought something I should be able to take it apart myself and repair it.
I also managed to find the Nespresso service manual for it (Krups Cube Nespresso Service Manual – xn5005 manual). While the external design is nice, the engineering is a bit crappy. If they weren’t trying to overcomplicate the design to keep the consumer out it would be a lot simpler. Sigh.
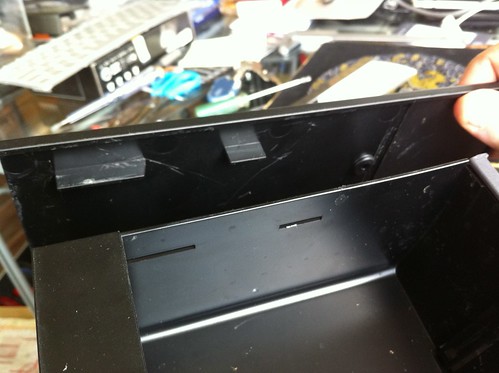
First to come off is the front chromed plastic part. Push both sides in and pull off.
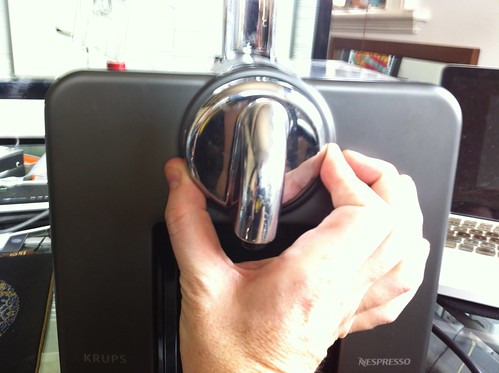
I managed to get one side off, then the other. Once you see how it clips on its fairly easy to get off.
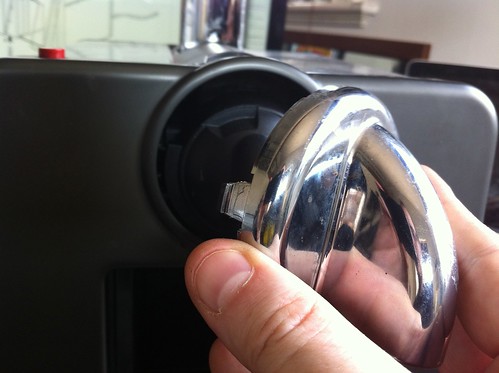
With that off, unclip the next plastic part on the nozzle.
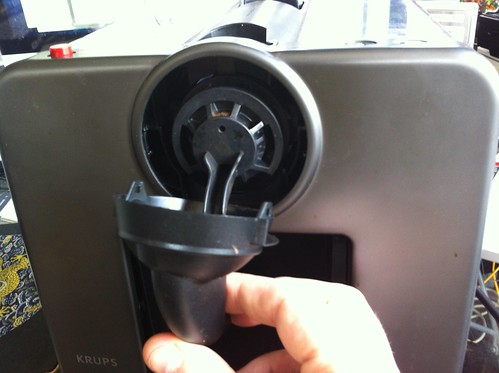
Next up is to remove the front faceplate.
Flip the unit upside down, then get 2 flat screwdrivers and put into both of the entry slots at the bottom. Twist slightly and it should come off. If you have trouble, do one side first, then the other. I usually get a credit card into the gap I make when I twist the screwdriver so that its easier to do.
The top should come straight off without too much hassle once you have the evil clips off at the bottom.
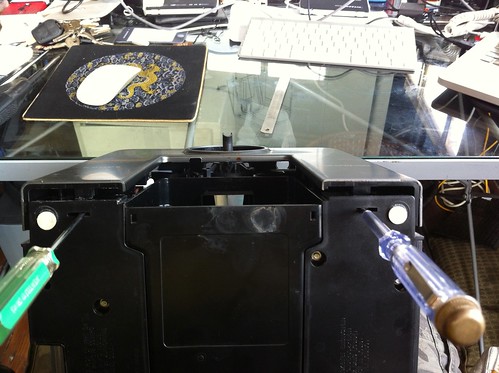
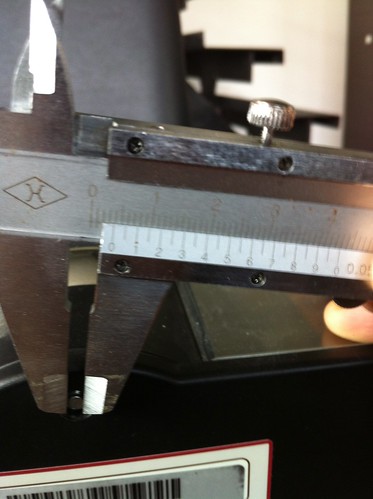
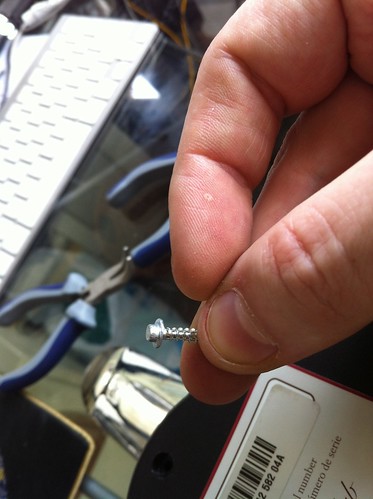
Next up is the back panel, with the security screws. As I couldn’t find the exact screwdriver, I bought a selection of pliers and they came out fairly easily.
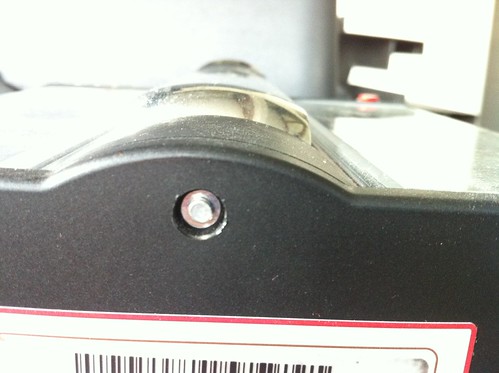
In case anyone can find them, the diameter is a 4mm oval shape.
I basically sat and twisted gently to get the screws out.
You need to remove the 3 at the back, and the two front ones at the bottom (closest to the back), for a total of 5 screws.
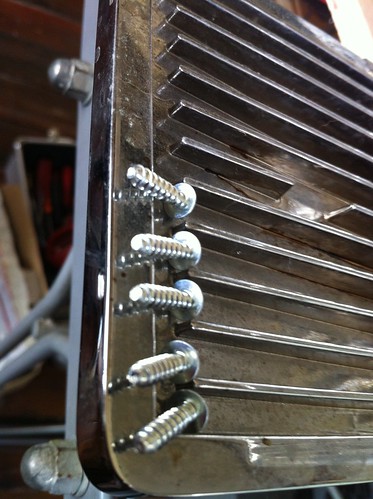
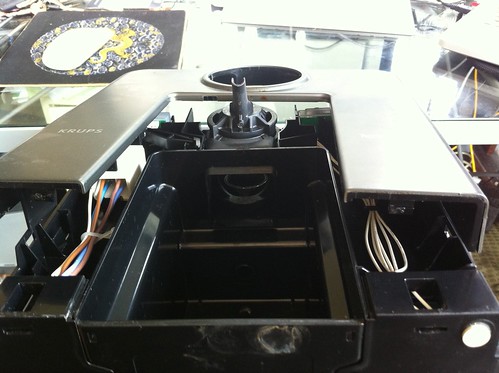
Once those five screws are out, the back can come off. Its a bit fiddly, as it didn’t want to budge much on the water tank side, but perseverance paid off.
Once you have the back off, the machine is reasonably accessible.
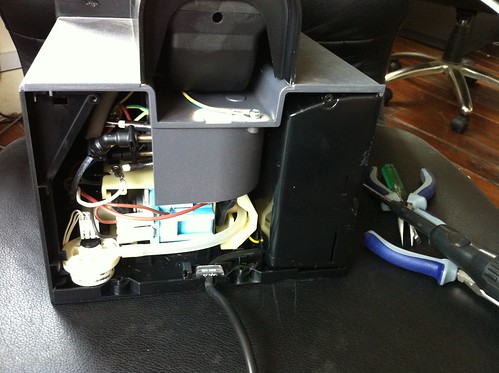
In my case, I just had to reseat one of the hoses, and retest.
The manual does give further instructions on how to get more of it disassembled from there, but thats as far as I needed to go.
While I was in there I gave it a bit of a clean also.
Compared to the other machine I have (a Saeco fully automatic), this is slightly better designed, but less serviceable. It still has the issue of electrics and water routing in the same area’s, which is silly, as that could be a failure/hazard point, but its safer than some i’ve seen.
Hopefully mine will now continue to give a few more years of service!.
If you need parts for them, this site appears to have some –
And of course after I finish this post, I find someone else doing similar things here –
https://chrisinmtown.github.io/blog/20100627_nespresso.html
Oh well..
Good luck!
24
Train Safety

The recent accident in Wenzhou has highlighted some of the issues that are present in train systems today.
The facts –
One high-speed rail train D301 from Beijing was headed for Fuzhou, this train was followed by train D3115 from Hangzhou to Fuzhou. At 20:34 or so, the train D3115 was hit by thunder, subsequently lost power and stopped.
Train D301 did not, and crashed into train D3115.
Two cars from train D3115 as well as four cars from D301 derailed, some falling off of a bridge.The trains are from different manufacturers –
D301 – CRH1 (Bombardier Regina, Swedish)
D3115 – CRH2 (Shinkansen E2, Japanese)
Archives
- November 2024
- November 2019
- October 2019
- August 2019
- April 2019
- February 2017
- September 2016
- June 2016
- May 2016
- September 2015
- August 2015
- June 2015
- April 2015
- December 2014
- October 2014
- September 2014
- July 2014
- June 2014
- April 2014
- October 2013
- July 2013
- May 2013
- April 2013
- March 2013
- January 2013
- December 2012
- October 2012
- August 2012
- July 2012
- June 2012
- May 2012
- April 2012
- March 2012
- December 2011
- November 2011
- October 2011
- September 2011
- July 2011
- May 2011
- April 2011
- March 2011
- February 2011
- January 2011
- December 2010
- November 2010
- October 2010
- September 2010
- August 2010
- July 2010
- June 2010
- May 2010
- April 2010
- March 2010
- February 2010
- January 2010
- December 2009
- November 2009
- October 2009
- May 2009
- April 2009
- March 2009
- February 2009
- January 2009
- December 2008
- November 2008
- October 2008
- September 2008
Categories
- Apple
- Arcade Machines
- Badges
- BMW
- China Related
- Cool Hunting
- Exploits
- Firmware
- Food
- General Talk
- government
- IP Cam
- iPhone
- Lasers
- legislation
- MODx
- MySQL
- notice
- qmail
- requirements
- Reviews
- Service Issues
- Tao Bao
- Technical Mumbo Jumbo
- Things that will get me censored
- Travel
- Uncategorized
- Useful Info