1
Debian with Time Machine
As most of the posts out there are horribly outdated, or provide incorrect information for the current versions in use, here are my quick notes on setting up a time machine share.
First up –
apt-get install netatalk
Check /etc/netatalk/afpd.conf has something similarish to this:
# This line goes in /etc/netatalk/afpd.conf

- -tcp -noddp -uamlist uams_guest.so,uams_dhx.so,uams_dhx2.so -nosavepassword
Add a line for your required shares into /etc/netatalk/AppleVolumes.default
# Time machine share

/nas/backup/timemachine "TimeMachine" cnidscheme:dbd options:usedots,upriv,tm  allow:lawrence,eugene,janice
Change the folder / names / users to your own ones obviously!
If its not going to be a time machine share, remove the “,tm”
Restart Netatalk
/etc/init.d/netatalk restart
You should be able to see the share in Time Machine Preferences.
See if you can backup. If you get a failure eg “Error 2”, make sure that the folder you use has write privileges for your user, then try again.
All in all pretty painless.
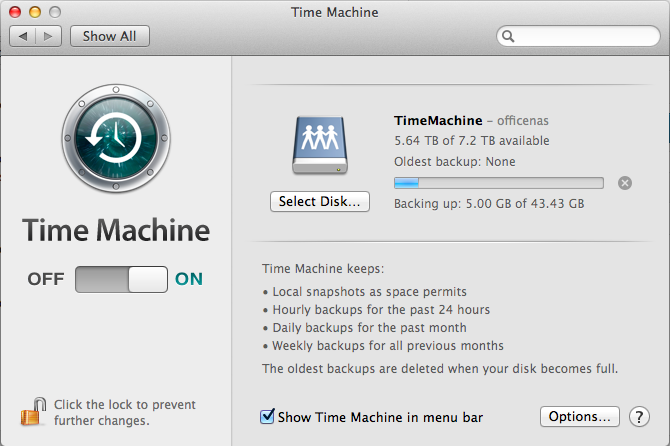
Proof it works –
Archives
- November 2024
- November 2019
- October 2019
- August 2019
- April 2019
- February 2017
- September 2016
- June 2016
- May 2016
- September 2015
- August 2015
- June 2015
- April 2015
- December 2014
- October 2014
- September 2014
- July 2014
- June 2014
- April 2014
- October 2013
- July 2013
- May 2013
- April 2013
- March 2013
- January 2013
- December 2012
- October 2012
- August 2012
- July 2012
- June 2012
- May 2012
- April 2012
- March 2012
- December 2011
- November 2011
- October 2011
- September 2011
- July 2011
- May 2011
- April 2011
- March 2011
- February 2011
- January 2011
- December 2010
- November 2010
- October 2010
- September 2010
- August 2010
- July 2010
- June 2010
- May 2010
- April 2010
- March 2010
- February 2010
- January 2010
- December 2009
- November 2009
- October 2009
- May 2009
- April 2009
- March 2009
- February 2009
- January 2009
- December 2008
- November 2008
- October 2008
- September 2008
Categories
- Apple
- Arcade Machines
- Badges
- BMW
- China Related
- Cool Hunting
- Exploits
- Firmware
- Food
- General Talk
- government
- IP Cam
- iPhone
- Lasers
- legislation
- MODx
- MySQL
- notice
- qmail
- requirements
- Reviews
- Service Issues
- Tao Bao
- Technical Mumbo Jumbo
- Things that will get me censored
- Travel
- Uncategorized
- Useful Info