8
Time Capsule repair
I’ve been seeing a bunch of failed Apple Time Capsules recently.
The issue is that the PSU’s are dying, as opposed to the HDD’s.
I took one apart to take a look, and the issue is the oh too familiar someone bought cheap capacitors that use the wrong formula. Tsk tsk Apple!
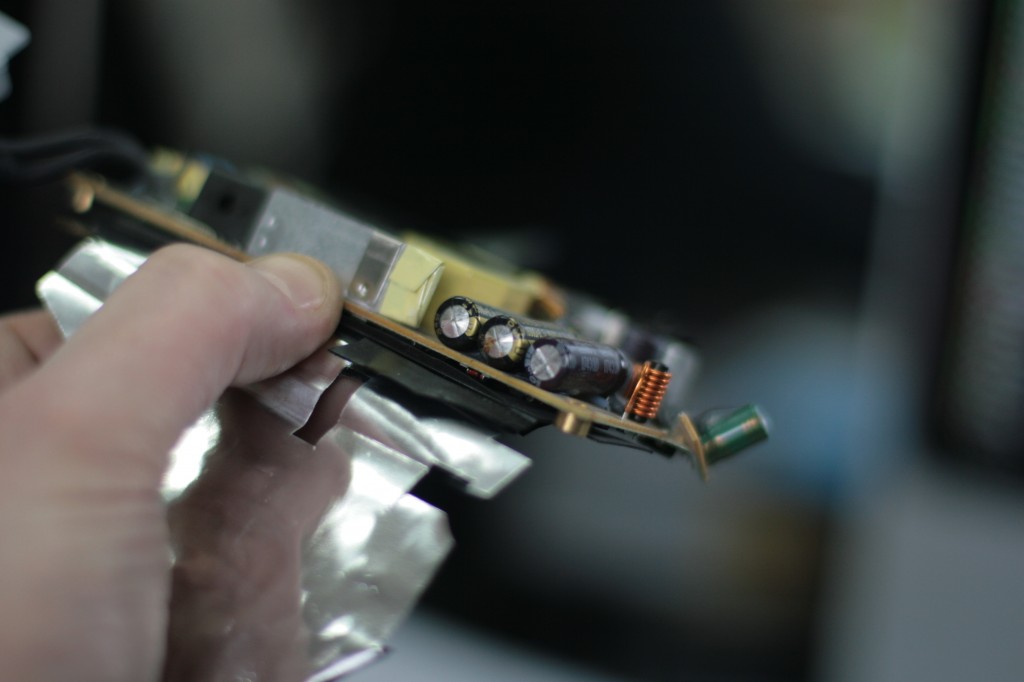
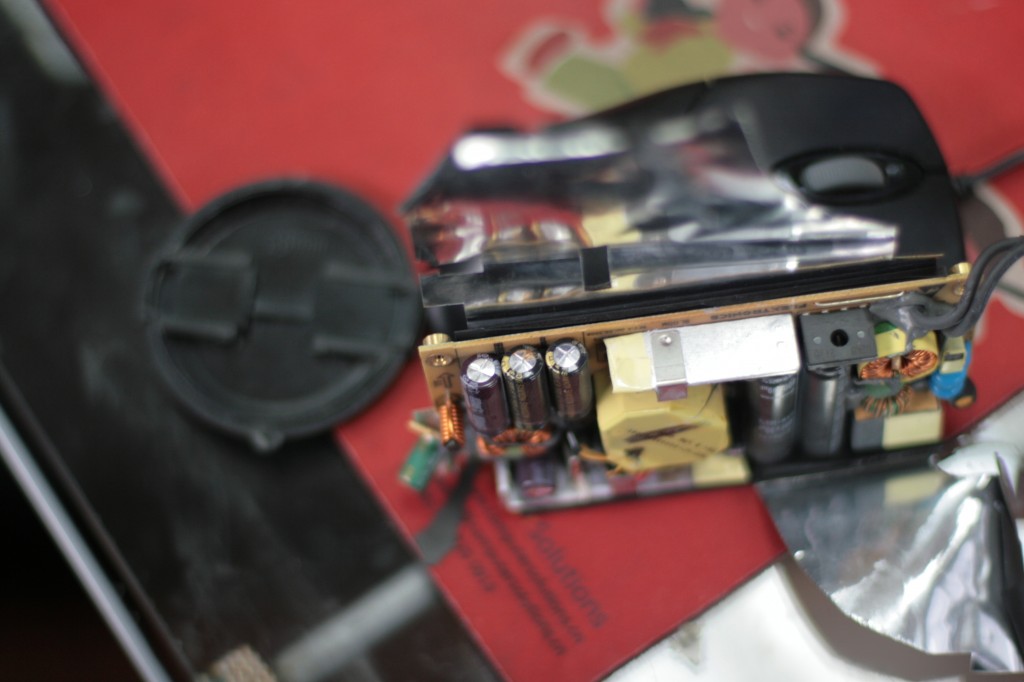
Here are some photos of a faulty power supply from a Time Capsule I’ve taken apart to demonstrate –
If you look closely, you’ll see that the middle capacitor on the right has leaked, and the others are bulging slightly. Its a little hard to see unless you look closely, but they are faulty!
WARNING
There are high voltages present in the PSU even when it has been off for a while, so do _not_ take it apart unless you know what you are doing. Otherwise, you are liable to shock yourself!
To take a Time Capsule apart, you need to carefully remove the plastic underpart first – some of these are easy to remove, some not. One was a complete nightmare – took ages and ages to remove the plastic, and of course I managed to gouge my fingers in the process!
Once removed, its a matter of unscrewing the 3 thousand tiny screws that hold the metal base in, and popping the metal base out.

Time Capsule plastic undergarments and my patented "pad extraction tool, which I also use for opening Mac Mini's."
In the two I fixed this week, I decided the easiest course of action was not to replace the power supply caps, but instead to remove the PSU completely, and re-use the existing connectors.
If you look at the left corner of the PSU (I’ve already destroyed mine removing the connectors), there should be 3 separate cables bunched together.
The Black power connector with only 1 cable is the 12v line.
The power line with 4 wires is the 5v line
and the power line with the most wires +-5 cables? is the ground.
As 5v / 12v is a fairly easy PSU type to find, I’ve just cannibalized some old 3.5″ HDD case PSU’s to remake the cable. Those are really cheap to buy – 30-40RMBish locally USD$5+-
The Apple PSU is a 12v 1.2A and 5v 3A. The PSU’s I used are 2A, but seem to be ok. Worst case, I can replace them if the Time Capsule draws too much current. I think it should be fine though, as the drives don’t really draw that much juice anyway. Only real current draw is when the drive initially powers up, and the Time Capsule seems to delay that till after its finished booting, so its less of a power draw.
The 2 PSU’s I used were fairly similar. I chopped the connector end off, both had 3 wires inside, so it was just a matter of using a multimeter to work out what wire carried what voltage, and then soldering the relevant ones to the connectors I removed from the PSU.
Tip – Push the new cable through the old power cable hole, then make a small loop on the other side with the cable *before* you solder the connectors. That way the cable can’t pull through and possibly break some / strain something later.
Bear in mind that the fan also mounts just above the power, so it might be a bit of a squeeze putting it all back together!
Solder the 3 wires to the relevant connectors, wrap up with electrical tape, and test without the HDD initially to make sure the yellow power light comes on.
If that comes up ok, power down again, connect the HDD, and recheck. If all is good, then put it back together!
I didn’t bother putting the plastic mat back under my Time Capsule.
Here’s how my completed Repaired Time Capsule looks –
So far its been working fine. I also took the opportunity to replace the HDD with a new 2TB drive, as mine was a 500G.
I’m enjoying the free space…
I think this is actually a better way of doing things for the Apple Time Capsule, as the PSU gets to be external, and there is less heat inside.
In theory this really should be something that Apple does a recall for, as its definitely an epidemic. I’ve personally seen a couple, and there are continual reports on the web for the same things. As Apple China is… not very good in our extensive experience – http://www.badappleservice.cn/ cough, cough, I tend to fix this stuff myself.
Good links on all this here –
http://forums.whirlpool.net.au/forum-replies-archive.cfm/1267631.html
There is also a PDF document on how to do this, but as its on that heinous den of iniquities (Google), its not accessible in China.
Should be on this link, but I can’t check, and I do no illegal evil, so no bypassing the most glorious firewall, that blocketh half the damn internet for me…
http://sites.google.com/site/lapastenague/a-deconstruction-of-routers-and-modems
Archives
- November 2019
- October 2019
- August 2019
- April 2019
- February 2017
- September 2016
- June 2016
- May 2016
- September 2015
- August 2015
- June 2015
- April 2015
- December 2014
- October 2014
- September 2014
- July 2014
- June 2014
- April 2014
- October 2013
- July 2013
- May 2013
- April 2013
- March 2013
- January 2013
- December 2012
- October 2012
- August 2012
- July 2012
- June 2012
- May 2012
- April 2012
- March 2012
- December 2011
- November 2011
- October 2011
- September 2011
- July 2011
- May 2011
- April 2011
- March 2011
- February 2011
- January 2011
- December 2010
- November 2010
- October 2010
- September 2010
- August 2010
- July 2010
- June 2010
- May 2010
- April 2010
- March 2010
- February 2010
- January 2010
- December 2009
- November 2009
- October 2009
- May 2009
- April 2009
- March 2009
- February 2009
- January 2009
- December 2008
- November 2008
- October 2008
- September 2008
Categories
- Apple
- Arcade Machines
- Badges
- BMW
- China Related
- Cool Hunting
- Exploits
- Firmware
- Food
- General Talk
- government
- IP Cam
- iPhone
- Lasers
- legislation
- MODx
- MySQL
- notice
- qmail
- requirements
- Reviews
- Service Issues
- Tao Bao
- Technical Mumbo Jumbo
- Things that will get me censored
- Travel
- Uncategorized
- Useful Info


