My coffee machine decided it would give up the ghost a while ago (due to lack of use I think).
I tried descaling, but that wasn’t working, and from what I could see (or hear in my case) happening looked like something simple had happened – one of the hoses had come off or wasn’t completely on, as not enough water was coming through the front, and the bottom had a small leak.
As I have successfully fixed other coffee machines in the past with similar issues, I thought I’d have a go at repairing mine.
First up was a quick google for my machine (Krups Cube XN5005) – unfortunately most of the posts were of people with similar issues, and no help.
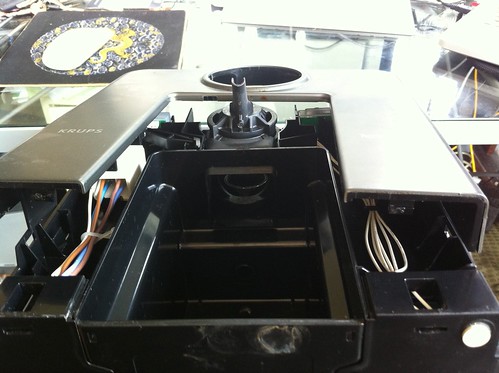
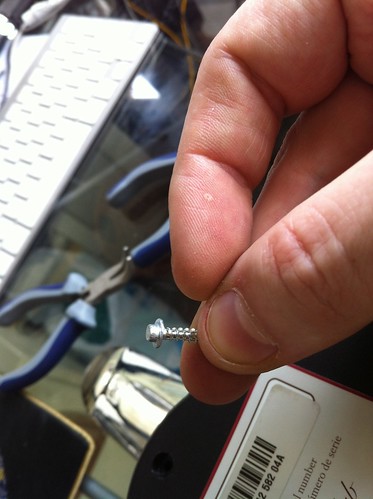
I brought the machine to the office and took a closer look. First issue is that it uses security oval style screws on some of the parts. Thats a pain in the ass, as its hard to find the exact screwdriver.
I drove off to the local tools market and did some shopping around, but no luck, so I bought a selection of needle nosed pliers instead.
There is zero reason to use security screws unless you’re trying to piss off the consumer. If I’ve bought something I should be able to take it apart myself and repair it.
I also managed to find the Nespresso service manual for it (Krups Cube Nespresso Service Manual – xn5005 manual). While the external design is nice, the engineering is a bit crappy. If they weren’t trying to overcomplicate the design to keep the consumer out it would be a lot simpler. Sigh.
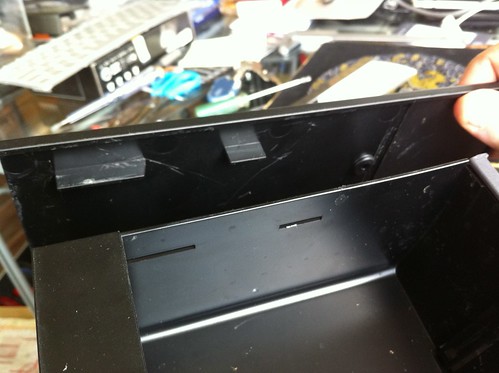
First to come off is the front chromed plastic part. Push both sides in and pull off.
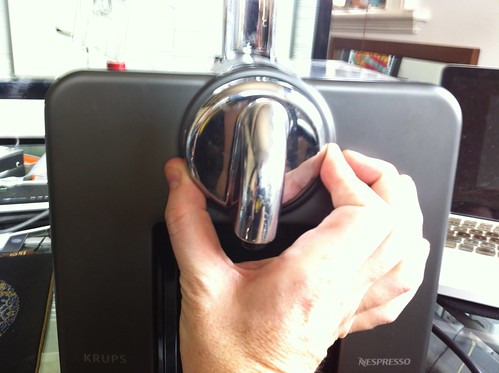
I managed to get one side off, then the other. Once you see how it clips on its fairly easy to get off.
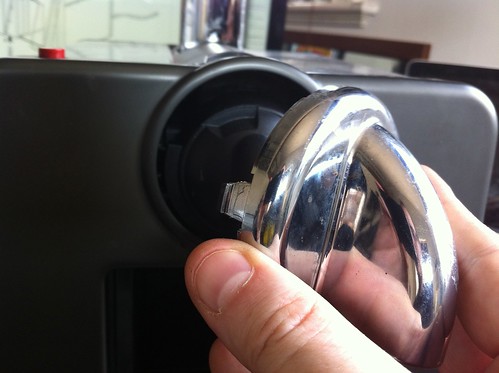
With that off, unclip the next plastic part on the nozzle.
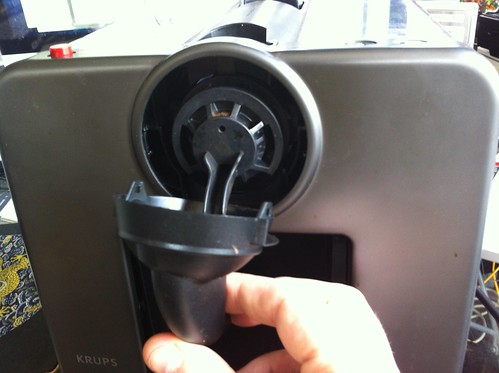
Next up is to remove the front faceplate.
Flip the unit upside down, then get 2 flat screwdrivers and put into both of the entry slots at the bottom. Twist slightly and it should come off. If you have trouble, do one side first, then the other. I usually get a credit card into the gap I make when I twist the screwdriver so that its easier to do.
The top should come straight off without too much hassle once you have the evil clips off at the bottom.
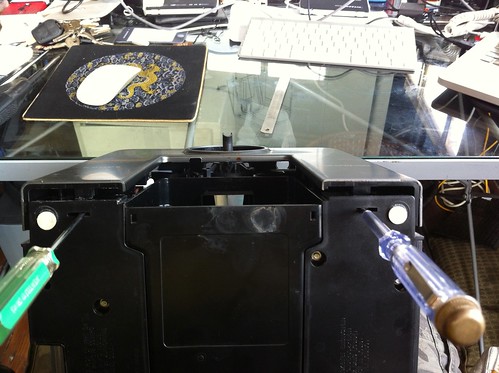
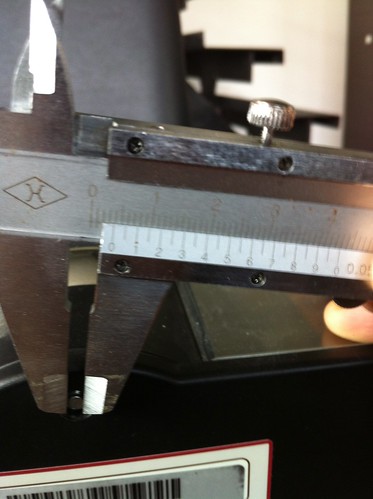
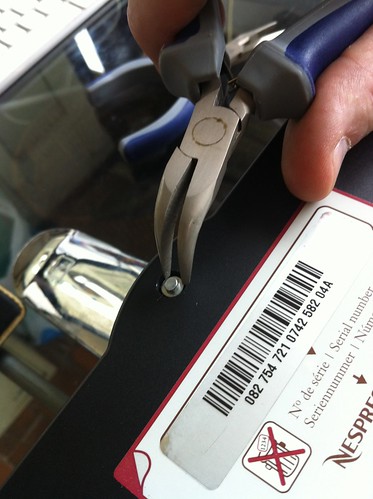
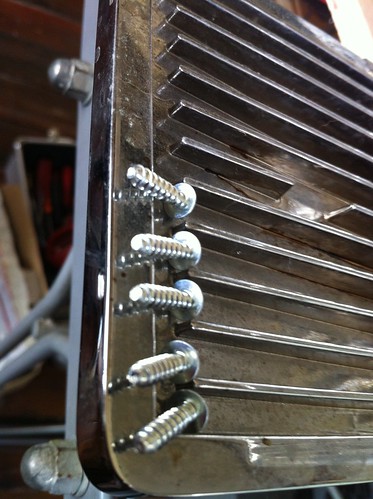
Next up is the back panel, with the security screws. As I couldn’t find the exact screwdriver, I bought a selection of pliers and they came out fairly easily.
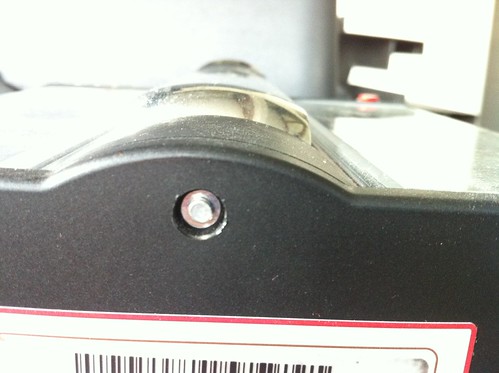
In case anyone can find them, the diameter is a 4mm oval shape.
I basically sat and twisted gently to get the screws out.
You need to remove the 3 at the back, and the two front ones at the bottom (closest to the back), for a total of 5 screws.
Once those five screws are out, the back can come off. Its a bit fiddly, as it didn’t want to budge much on the water tank side, but perseverance paid off.
Once you have the back off, the machine is reasonably accessible.
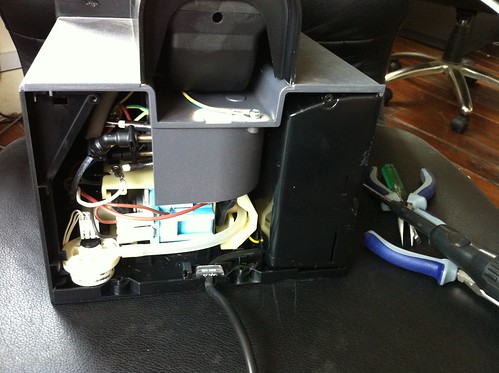
In my case, I just had to reseat one of the hoses, and retest.
The manual does give further instructions on how to get more of it disassembled from there, but thats as far as I needed to go.
While I was in there I gave it a bit of a clean also.
Compared to the other machine I have (a Saeco fully automatic), this is slightly better designed, but less serviceable. It still has the issue of electrics and water routing in the same area’s, which is silly, as that could be a failure/hazard point, but its safer than some i’ve seen.
Hopefully mine will now continue to give a few more years of service!.
If you need parts for them, this site appears to have some –
And of course after I finish this post, I find someone else doing similar things here –
https://chrisinmtown.github.io/blog/20100627_nespresso.html
Oh well..
Good luck!
Do you like this article? Share It!


Archives
- November 2024
- November 2019
- October 2019
- August 2019
- April 2019
- February 2017
- September 2016
- June 2016
- May 2016
- September 2015
- August 2015
- June 2015
- April 2015
- December 2014
- October 2014
- September 2014
- July 2014
- June 2014
- April 2014
- October 2013
- July 2013
- May 2013
- April 2013
- March 2013
- January 2013
- December 2012
- October 2012
- August 2012
- July 2012
- June 2012
- May 2012
- April 2012
- March 2012
- December 2011
- November 2011
- October 2011
- September 2011
- July 2011
- May 2011
- April 2011
- March 2011
- February 2011
- January 2011
- December 2010
- November 2010
- October 2010
- September 2010
- August 2010
- July 2010
- June 2010
- May 2010
- April 2010
- March 2010
- February 2010
- January 2010
- December 2009
- November 2009
- October 2009
- May 2009
- April 2009
- March 2009
- February 2009
- January 2009
- December 2008
- November 2008
- October 2008
- September 2008
Categories
- Apple
- Arcade Machines
- Badges
- BMW
- China Related
- Cool Hunting
- Exploits
- Firmware
- Food
- General Talk
- government
- IP Cam
- iPhone
- Lasers
- legislation
- MODx
- MySQL
- notice
- qmail
- requirements
- Reviews
- Service Issues
- Tao Bao
- Technical Mumbo Jumbo
- Things that will get me censored
- Travel
- Uncategorized
- Useful Info