25
How to make biltong
As there doesn’t seem to be any Biltong available in China, I’m creating my own here in South Africa, so I can bring back for friends.
This makes about about 3-3.5kg of biltong once dry.
Our model for the day – my cousin Joel.
Instructions below:
Creating our Biltong Drying Box
First, go buy a plastic storage box, this needs to be fairly deep, as we will be hanging meat vertically. Recommend buy something with an easily removable lid thats transparent for easier checking on biltong production.
We procured our box at Plastics Warehouse opposite Kenilworth Centre in Cape Town. Carrefour in Shanghai has suitable boxes for those in China.
We prepared the box for usage, by drilling lots of small airholes in the side, and lid, swiss cheese style. Recommend use a drill with a 1mm bit or similar. The idea is that air can go in, but nothing else.
Once the airholes have been created, we drilled holes for dowels that the meat is going to hang on.
Dowels should be near the top of the box, and spaced appropriately. Note that the meat cannot touch the sides of the box, so make sure to leave enough space on the left/right of the dowels for the thickest cuts of meat. Our efforts are below:

Biltong Box
Plastic is fairly simple to modify, and easy to clean.
Tools needed – drill, and about 10 minutes of time. Add another 5 minutes to drink beer once done.
Total cost for box + dowels + beer = R200
Shopping for ingredients
We shopped for the meat at Stocks Butchers on Lansdowne road.
The best meat for Biltong is Beef – Silverside or Rump . We used Silverside – total cost for 5kg of meat – R250. Note that meat needs to be fresh, and not frozen. You can find similar meat in Shanghai at the live markets, or at Carrefour quite easily.
Once we procured the beef, it was off to get spices, and vinegar.
This meant a trip to Spar on Rosmead avenue, as KC was choc a bloc for Xmas, and to be avoided!
Bought 5 x 28g packets of Coriander, one spice jar of Black Pepper, and some assorted seasonings, as well as 2 large bottles of White Spirit Vinegar. For spices we used Peri Peri, and Cajun, but Texan Spice is good too. If you can get chilli pepper, thats also good. Use your imagination and choose something you like. One tip, don’t use anything with too much salt, or you’ll have a hard time eating the biltong!

Last but not least, don’t forget to go buy a bunch of paperclips – we’ll need those to hang the meat up.
Total cost for ingredients – about R350
Prepping
You’ll need a clean surface area, with a decent workspace, as well as the following items:
A clean (but old towel) for laying the meat onto.
Sharp knives for cutting.
Cutting Board.
Cooking dish for soaking the meat.
A few bowls for mixing the spices to taste, and a large plate for spicing the meat.
Pestle and mortar or a Mixer
Beer.
We made the biltong with two people – works quicker that way.
One person did the spices, the other the meat prep.
Spices
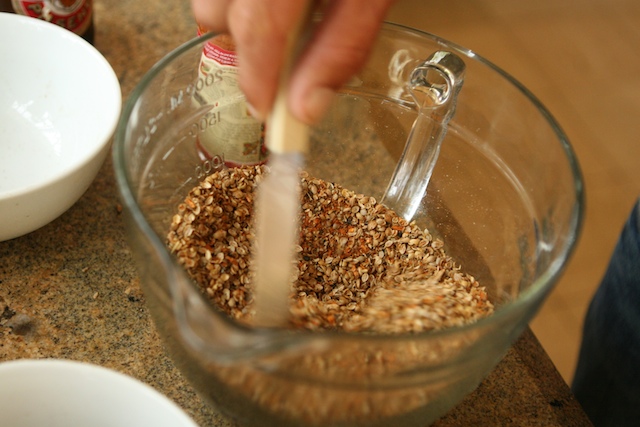
Prep the coriander seeds by crushing with either a mixer or pestle and mortar. We didn’t have a mixer, so we had to do it the hard way.
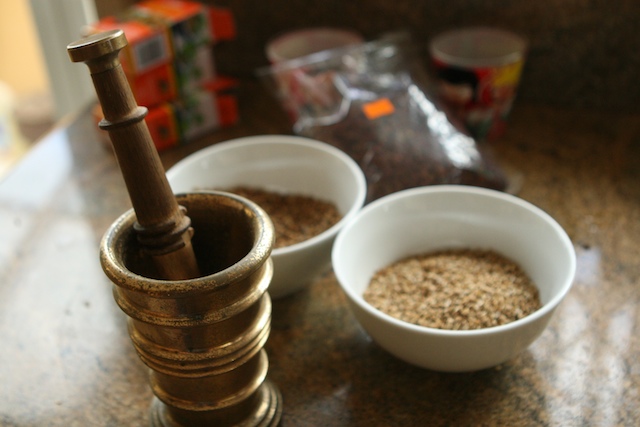
Once the coriander is crushed, separate out into 2 bowls, one with 3/4 of the coriander, and another with the remaining quarter.
Add the Black pepper into both bowls, and mix to taste.
Add spices sparingly, and taste test until happy. Remember, it shouldn’t be too salty!
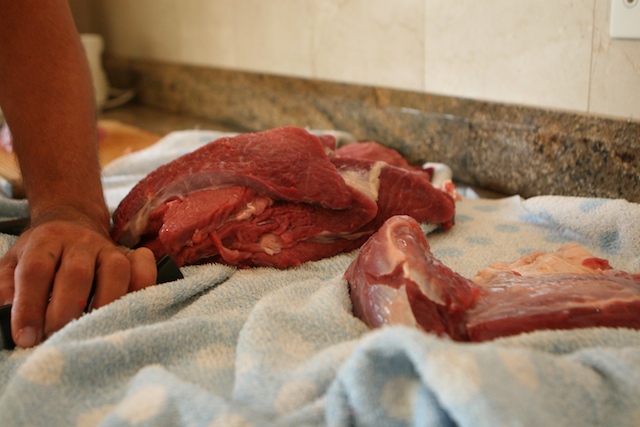
Meat Prep
Put the meat onto the cutting board, and trim off the fat/gristle (if any).
The meat should be cut with the grain – cut the larger pieces first, then trim down.
This is what we started out with:

5kg of rump
Cut the meat to size, try to keep the thickness down to 1cm max. Large biltong pieces should be approximately the same size as a normal steak:

Steak sized cut
Pile the cuts together so that each size/cut is grouped together:

Steak cuts
Once all the meat is cut, its time to prepare the vinegar. The vinegar will help break down the meat, and also prevent mold, so this is an extremely important step!
Fill a large bowl with vinegar and submerge the meat into the bowl. Leave the meat in, until it starts to feel slimy. This usually takes between 5 – 15 seconds, depending on the size of the cuts.

Soaking in vinegar
Lay out the meat on the towel, trying to keep sizes together. Start from one end of the towel when you lay the meat out.

Laying out the meat
You’ll notice that the meat will start to turn slightly white after a few minutes. This is good.
In our case, it took about 5 minutes for the large first cuts to turn white. This co-incided nicely with finishing the first soak.
Take a piece of meat that has already been soaked, and has turned white, and place back into the vinegar, leave to soak for 5-10 seconds but this time, place the meat back on the towel reverse side up.

Resoaking

Resoaking 2
Repeat until all the meat is back on the towel.

Soaking the other side of the meat
After another 5 minutes or so, both sides of the meat should be slightly white.
We’re now ready for spices.
Get a large plate or tray (in our case), and spread the spice out evenly.

Spice
Now take the first piece of meat, and liberally, but evenly coat the cut of meat.

Coating in spice
Remember to coat the sides too!

Remember to coat the sides!
Now take a paper clip, and twist into an S hook shape. This is where the second person comes in handy.
Take a corner, and pierce the paperclip through the meat so that it will hang evenly.

Hooking the meat
You want to make sure that the meat doesn’t fold over and touch, so make sure that you pick an appropriate edge to hang with.
Place the meat in the container, and bend the paperclip so that it hangs securely. Its important that the meat hangs freely. It should not be touching the sides of the box, or other pieces of meat.

Hanging the meat
Repeat until all the pieces are coated and hung.

Hanging the rest of the meat
Once all the pieces are hung, take a break, and drink the rest of the beer.
Our finished prep work looked like this, note the airholes in the side of the box.

Almost done!
We recommend that you put some old newspaper in the bottom of the box in order to soak up and absorb and any liquids that will drip down from the meat. This should be removed, replaced and disposed of daily as you check the drying biltong.
Move the box to a clean, dry area so that it will be undisturbed, and away from hungry pets. Biltong needs about 3-4 days to completely dry. Check the biltong twice a day, to make sure that no mold is growing, and everything looks ok. Ensure that no pieces of biltong are touching the sides of the box, or other pieces of meat. Drying Biltong will smell incredibly good for at least the first day or two; when its almost dry, the smell will be almost gone, so be prepared to keep pets and flatmates away until its completely ready.
We also added an extraction fan to the side of our box to create airflow. Those of you in humid climates such as Shanghai will need a dehumidifier as well.
Our professionally installed extraction fan:

Extraction Fan
Our biltong looked like this after 1 day of drying:

Biltong Day 1
You’ll know when the biltong is done when the smell is almost gone, and the meat has turned black. This usually takes 3-4 days for the larger pieces, although smaller pieces can be ready in as few as 2 days.
Once the biltong is ready, you’ll need to either eat it, or freeze it.
We bought a vacuum sealer, and will seal the biltong in that as soon as its ready. For those without a vacuum sealer, freeze the biltong, and take out to eat when you feel like it.
Enjoy!
Do you like this article? Share It!


Archives
- November 2024
- November 2019
- October 2019
- August 2019
- April 2019
- February 2017
- September 2016
- June 2016
- May 2016
- September 2015
- August 2015
- June 2015
- April 2015
- December 2014
- October 2014
- September 2014
- July 2014
- June 2014
- April 2014
- October 2013
- July 2013
- May 2013
- April 2013
- March 2013
- January 2013
- December 2012
- October 2012
- August 2012
- July 2012
- June 2012
- May 2012
- April 2012
- March 2012
- December 2011
- November 2011
- October 2011
- September 2011
- July 2011
- May 2011
- April 2011
- March 2011
- February 2011
- January 2011
- December 2010
- November 2010
- October 2010
- September 2010
- August 2010
- July 2010
- June 2010
- May 2010
- April 2010
- March 2010
- February 2010
- January 2010
- December 2009
- November 2009
- October 2009
- May 2009
- April 2009
- March 2009
- February 2009
- January 2009
- December 2008
- November 2008
- October 2008
- September 2008
Categories
- Apple
- Arcade Machines
- Badges
- BMW
- China Related
- Cool Hunting
- Exploits
- Firmware
- Food
- General Talk
- government
- IP Cam
- iPhone
- Lasers
- legislation
- MODx
- MySQL
- notice
- qmail
- requirements
- Reviews
- Service Issues
- Tao Bao
- Technical Mumbo Jumbo
- Things that will get me censored
- Travel
- Uncategorized
- Useful Info